
Dahi.ai
About

Dahi.ai is a chat-bot creation platform. Our system's most basic feature is it's how easy to create a basic chat-bot in couple of minutes. And grow with step by step.
Dahi.ai has couple of systems within. One is chat-bot the other one is live-chat and more...
Chat-bot system is responsible of what to response to questions. Live-chat system is responsible of delivering messages between chat-bot, customer and customer service agent.
There couple of more system that helps or adds more features to the stack. For example template feature. This is one of the new features that is open to the users. With template system you can connect your api's to dahi.ai without needing to code a new message formating system and host it. With template you can create your micro-service's that hosted in our system to help you create and modify api responses beyond just text outputing.
Registration
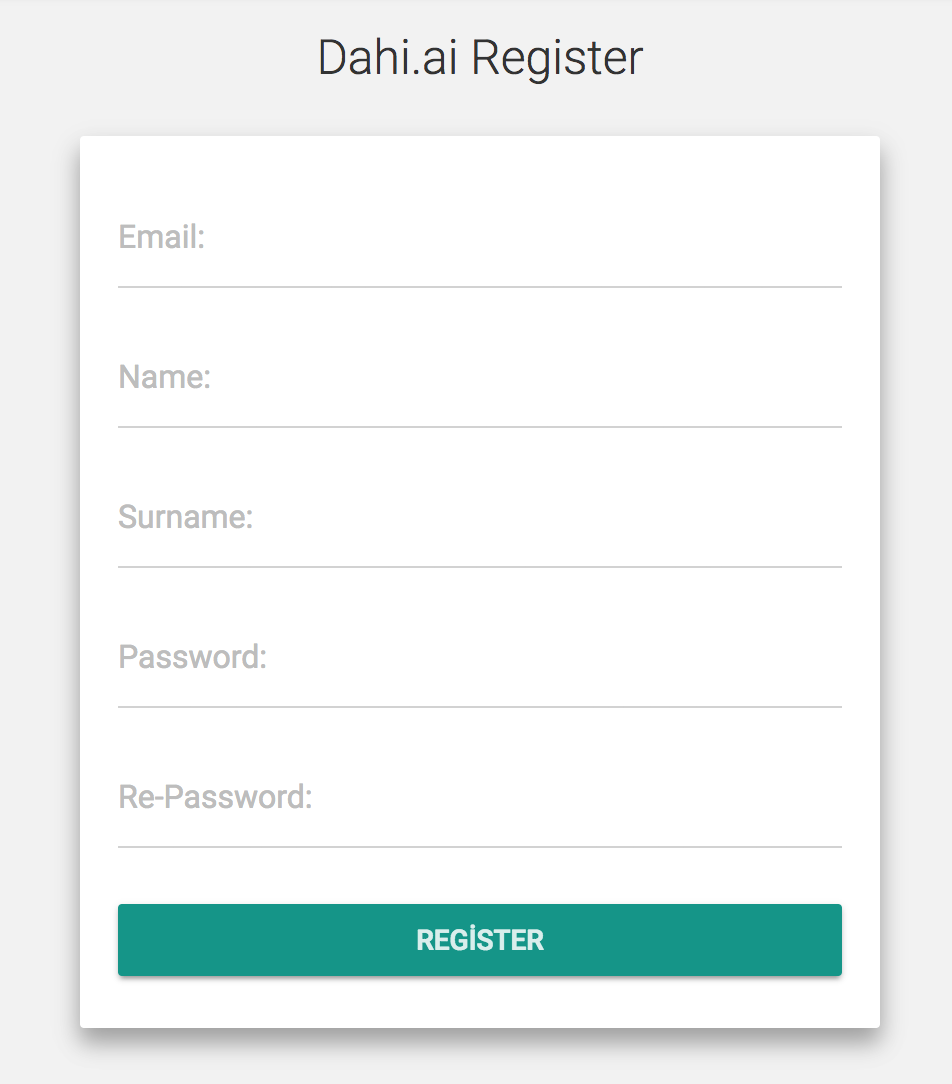
Registering is easy, just go to register page. Type your name, surname, email, password and repeat the same password. Click to register button and you're done.
Dahi.ai Platform is free. You can start to create your chat-bot without coding required.
Bot
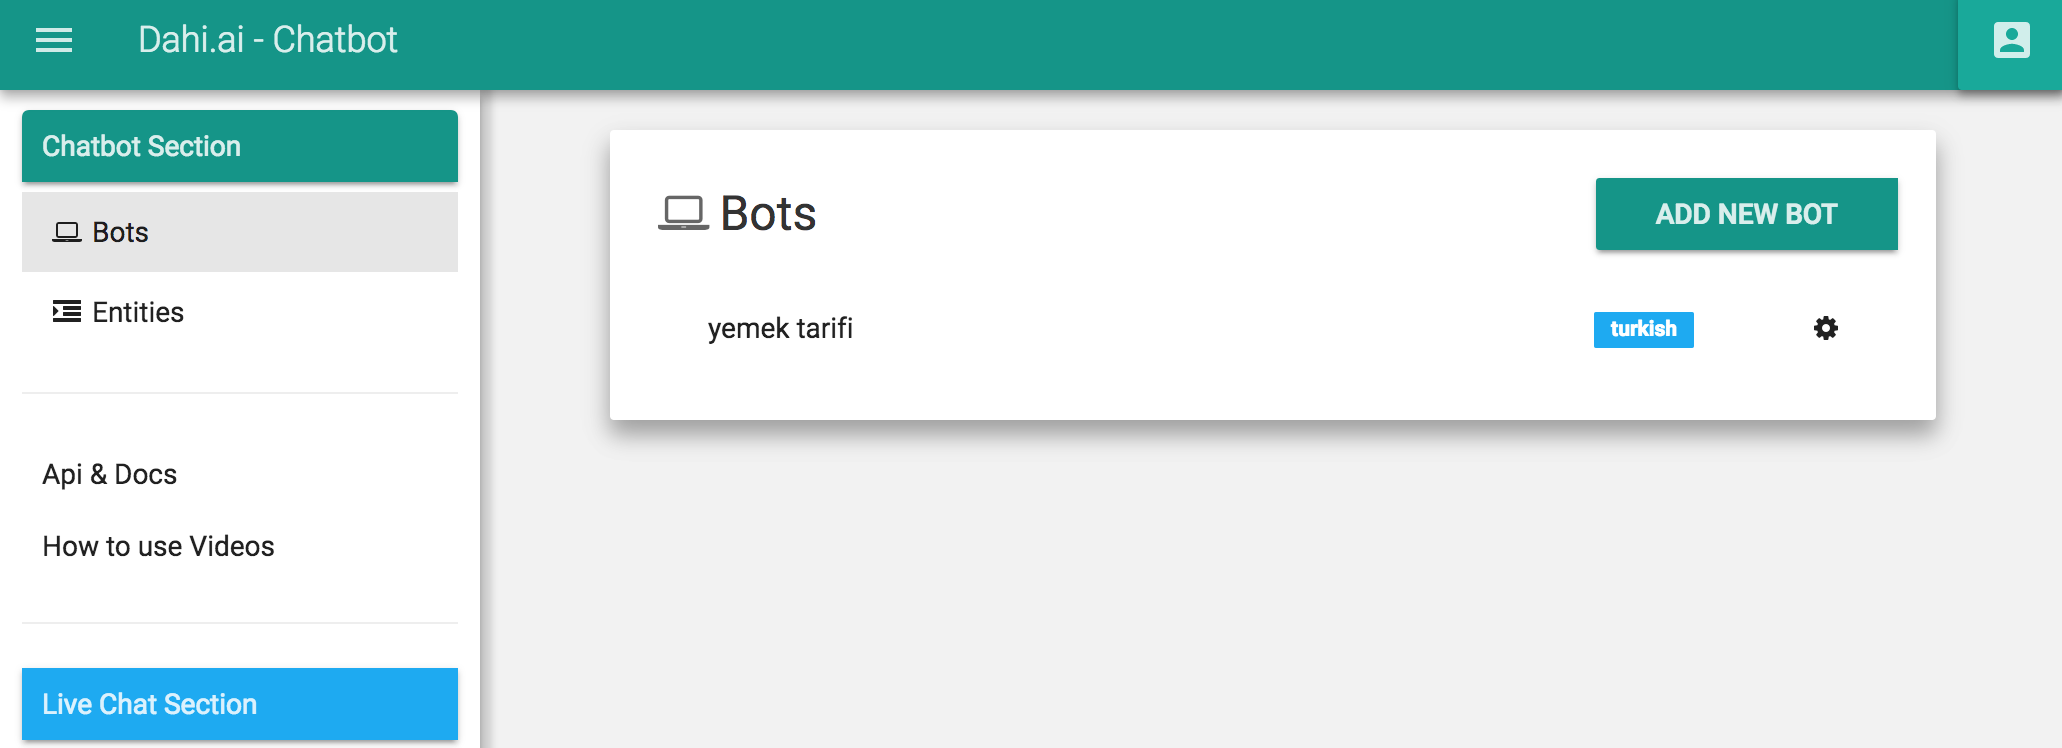
Here you can create, delete and modify your chat-bots.
- To edit this bot's intent click over it.
- To edit this bot's name or delete it click to the settings button at the right of the list.
- To create new bot click to "Add new Bot" button.
Bot Create
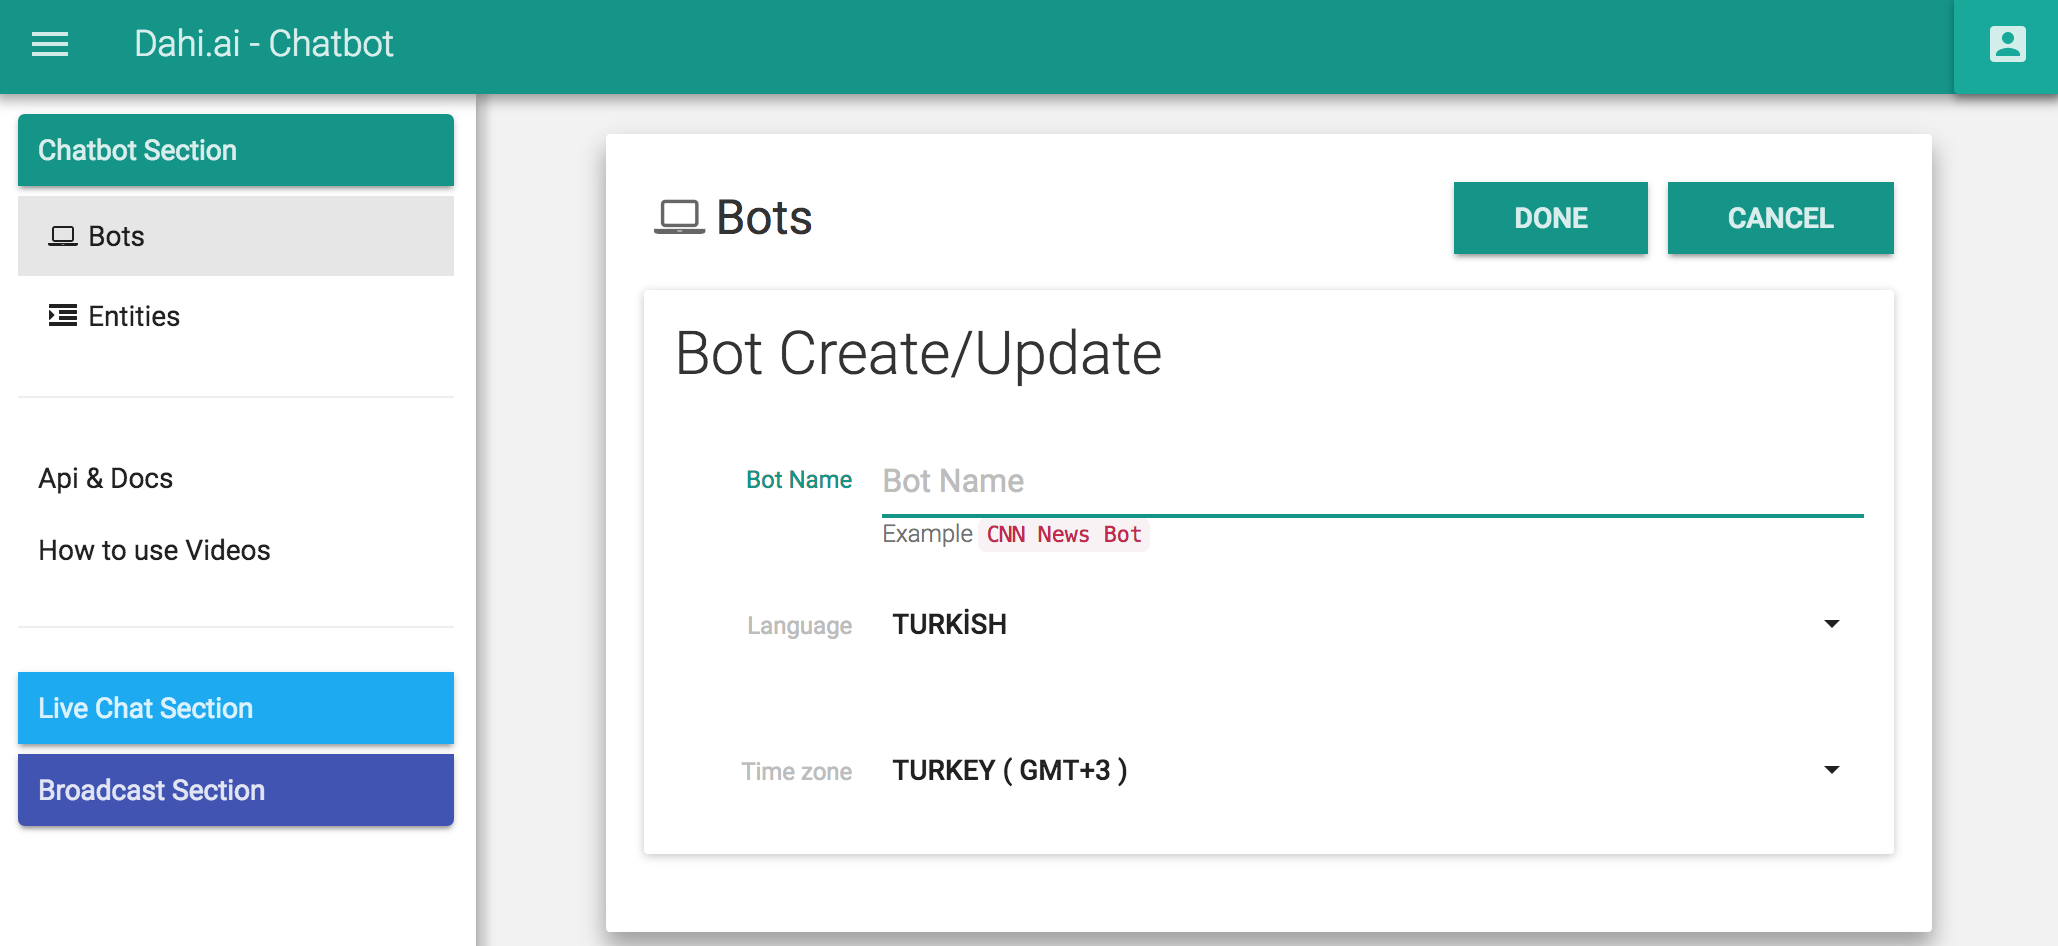
Creating a new bot is easy you just have to give it a name and select which language you want to create a bot. Click "done" button to finishing the bot creation. You can change this settings after in chat settings page.
Bot Intents
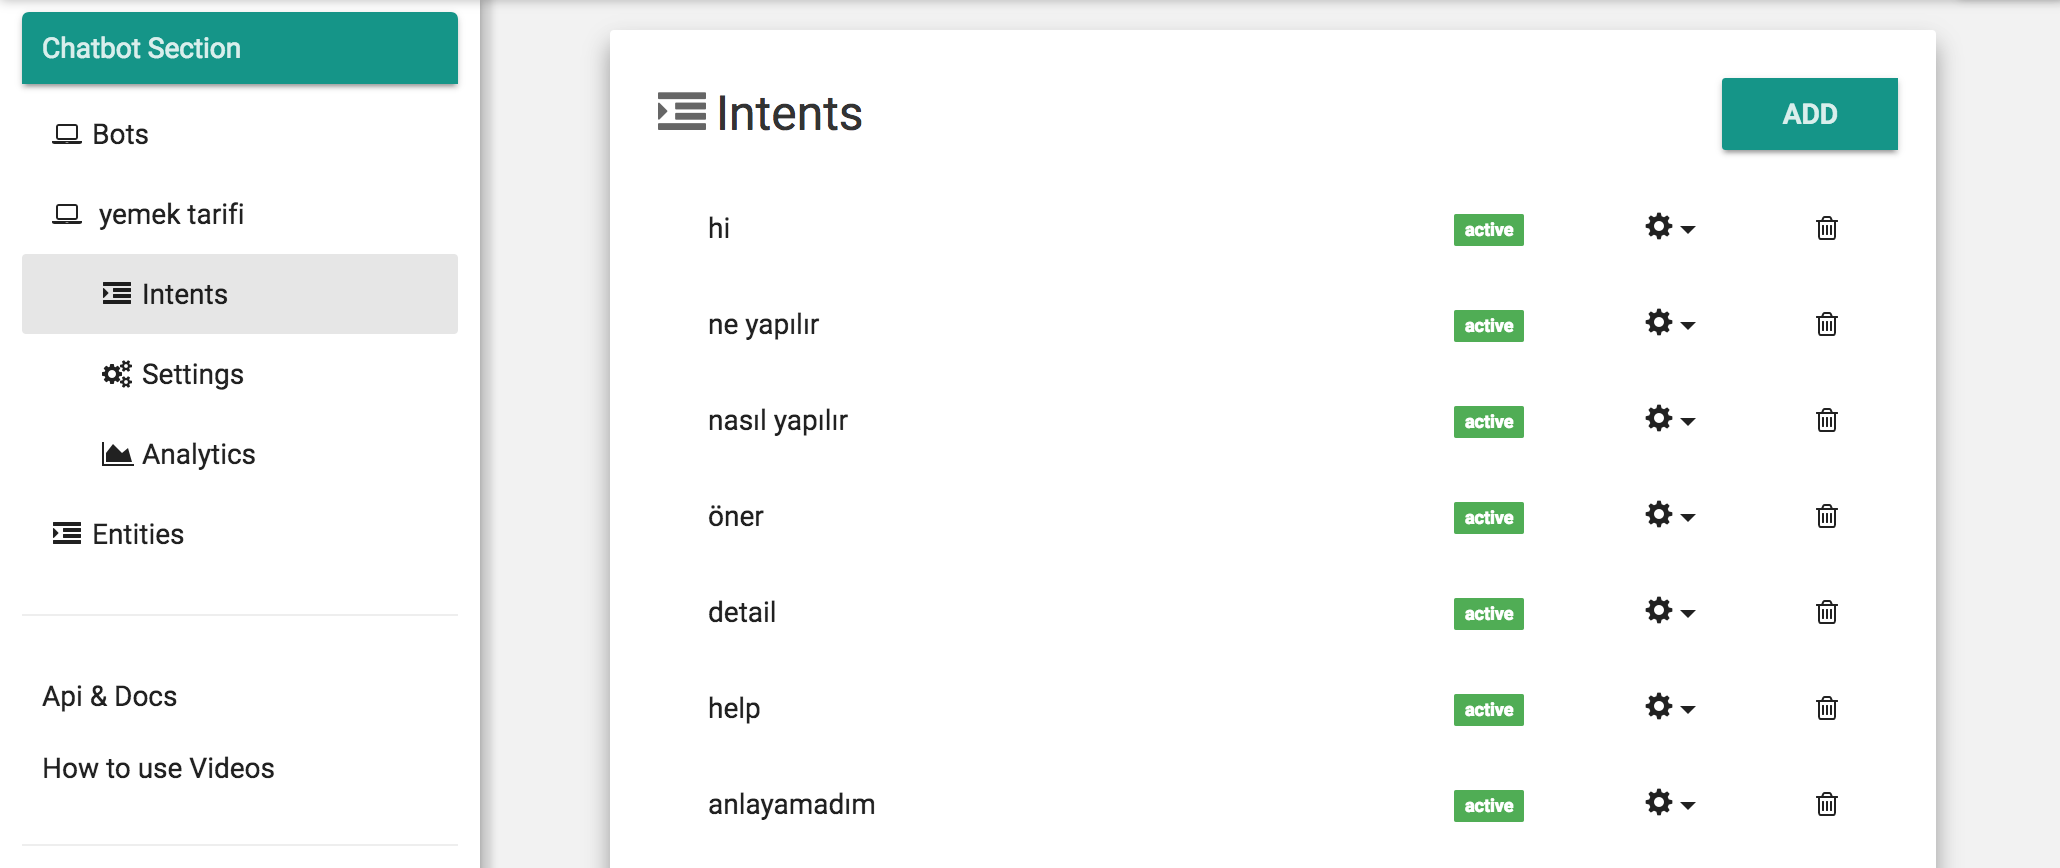
This is where we can add logic to our bot. Every intent is responsible for a job. Some to detect user inputs and response, some to create more complex logic to improve user engagement.
For more information check out intent documentation section
Intent
How to Create Intent?
Basic Intent - Hello World
Hello World!
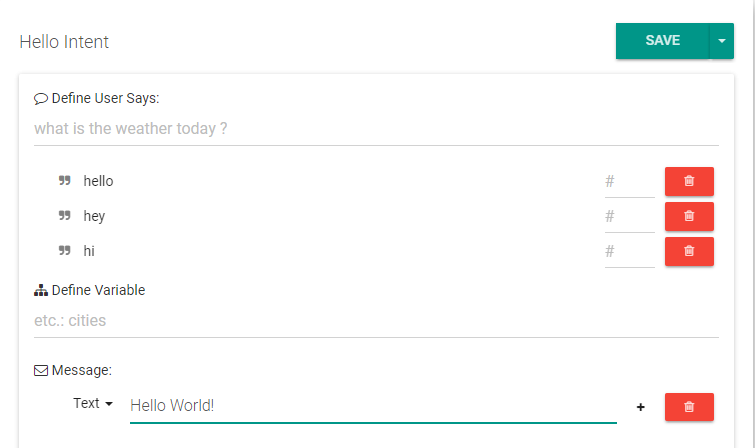
I will show you how to create an easy intent to your bot. Let's make a Hello World! intent. This intent has just one job. Whenever user says hello, it will make to your bot response as 'Hello World'.
- Select your bot from bots list.
- Click Intents on the left side.
- Click ADD button in the opening page.
- Name your intent.
- Type your inputs on the Define User Says section and press enter.
- Enter your output text which will be shown to yours.
- Finally, Save your intent with save button on the upper-right corner.
Advanced Intent
Input
On here, you are defining what user inputs will trigger your intent. You can enter a long sentence here as well as a single word. It's all about what user's input should activate your intent.
After entered your sentence, you can see each word are clickable. You can select those words for marking them as required word. This mean whenever user enter an input sentence, system check this sentence with each input row and activate it if and only if sentence contains row's all required words.
If there are some unnecessary or wrong sentences you can remove them with delete button on the right side.
Variables
What is Variable?
Variable is a value that can change, depending on conditions or on information passed to the intent. It is useful for store the value and use it on other part in the intent such as operation section or forward section.
How to create Variable?
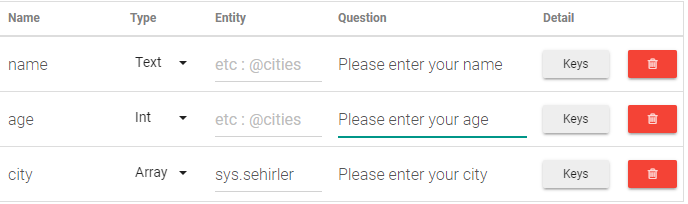
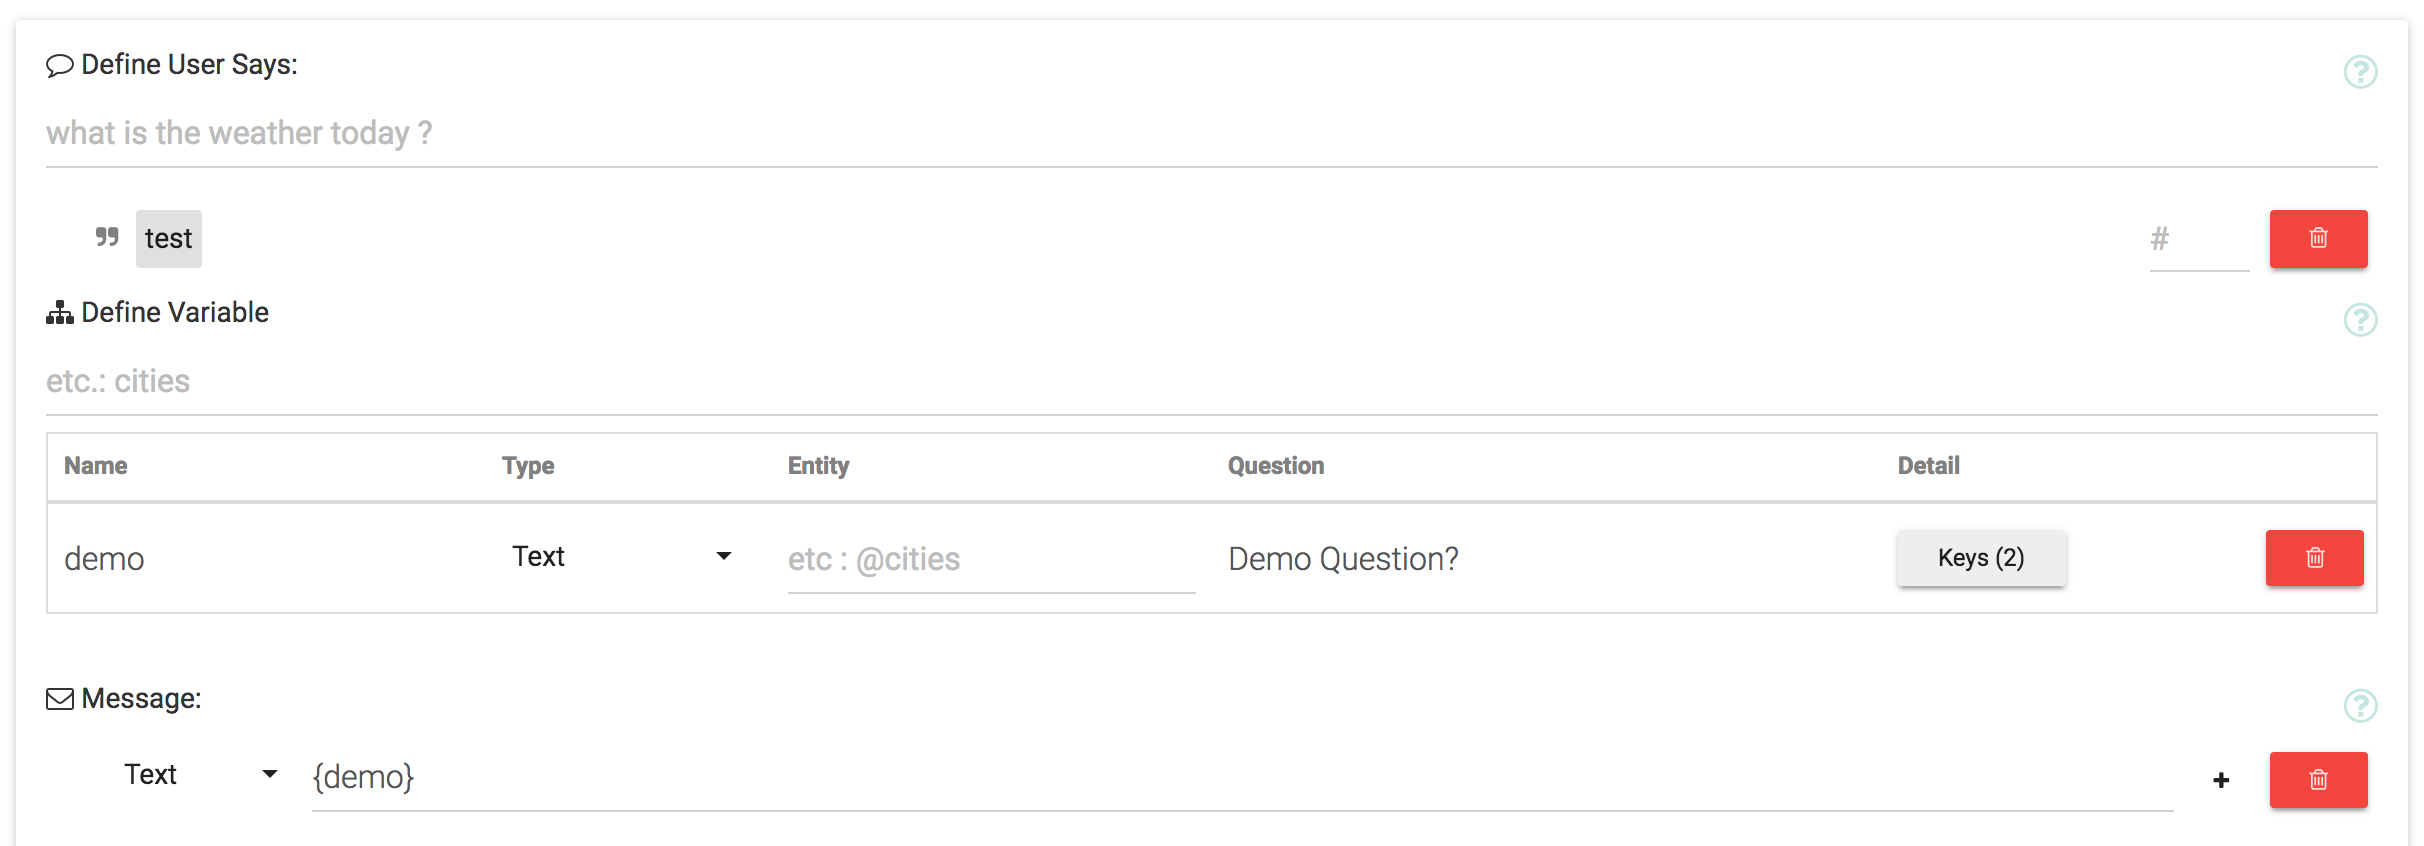
Enter your variable's name to input area below Define Variable header. After you enter, there will be a row about its attributes.
| Key | Description |
|---|---|
| Name | Name of your variable. It must be unique.(Required) |
| Type | Variable type. You can choose one of the 12 types in the list such as Text, Array etc. Please look Variable Type for further info. (Required) |
| Entity | Required for only array-like variable types. You can select from your entities or system entities. |
| Question | If variable has no value, system will prompt this area text to user and will set the answer to this variable. (Required) |
| Details | You can set some specific values to your variable in here such as regex or default value. For further info please look Extras section. |
| Remove | This button will remove the variable row. |

After filling all required areas now your variable is ready to use it. In anywhere in the intent you can call your variable with {$myVariableName}.
Variable Types
| Type | Description | Example |
|---|---|---|
| Text | For string values | Hello |
| Int | For integer values | 12456 |
| Regex | For string values with regex matching. Needs regex key. | es123 with regex:\w{2}\d{3} |
| Identifier | For 11 digit country identification number. Only for turkey right now. | 12345678901 |
| Location | For location value such as location sharing messages | 41.015137,28.979530 |
| For email values | [email protected] | |
| Phone | For phone type values | 05xx322xxxx, +905xx322xxxx, 5xx322xxxx |
| Datetime | For Date and Time values | tomorrow at 3pm |
| Time | For Time values | at 3pm |
| Date | For Date Values | 3 day later, tomorrow |
| Array | For Text array selections | |
| Horizontal Scroll Array | For Horizontal Card selections | |
| Multi Array | For Text array selections with ability to select multiple answer |
Variable Keys options
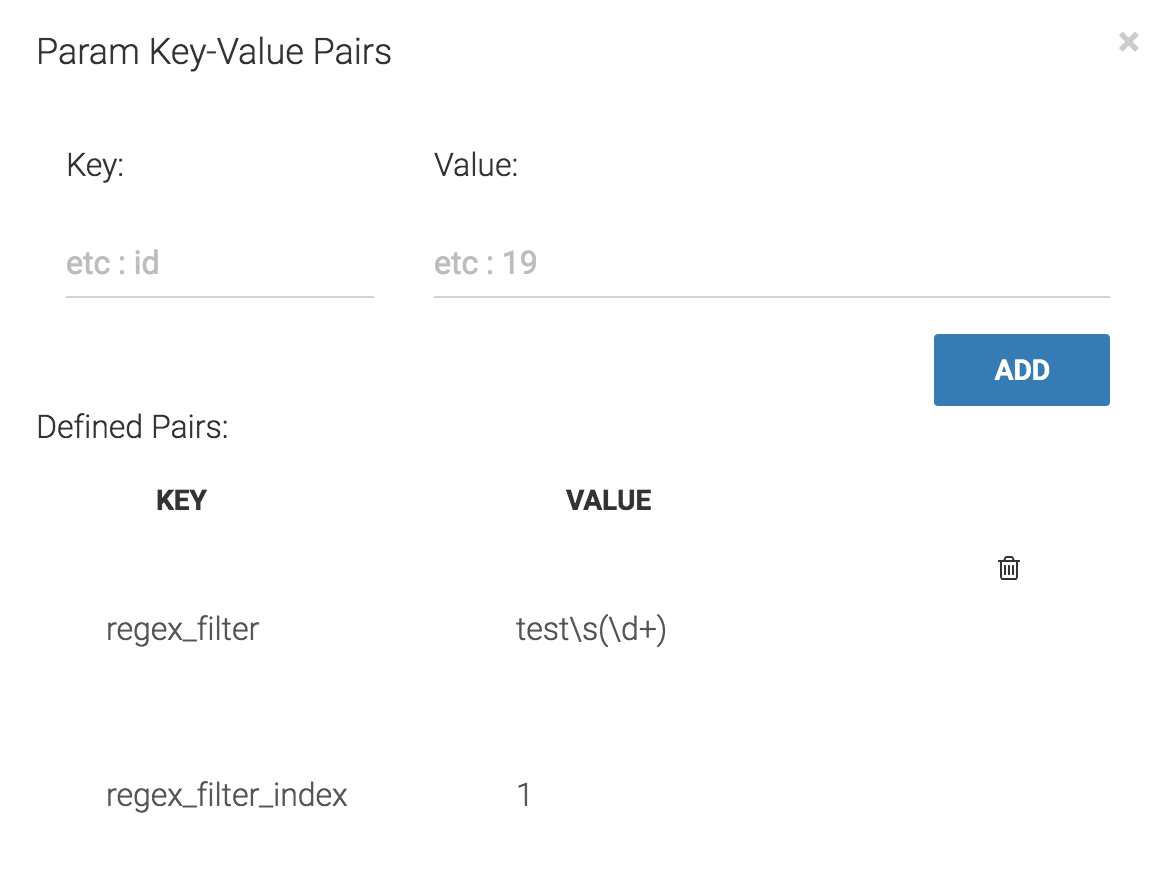
- default: default value for variable if a value is not defined for it.
- regex_filter: regex detect for type
Textvariable. - regex_filter_index: regex group index to select. Needs regex_filter. In the example if a user types test 123 our paramater would put 123 to variable.
- regex: regex detect for type
Regexvariable.
Regex type is a little bit different from Text type. Text type with regex_filter would try to detect value from first message that triggers this intent and fill the variable but if he can't find a value matches with regex it would ask the variable question to user to fill the variable. In this case user can provide any string answer to this variable without limits of regex. In short in Text type with regex_filter, regex is used only for first time value detection.
If you want to do a custom matching rules that must be followed by user answer like a project number that has to start with 2 string and end with 3 number you can use Regex variable type with regex key defined as \w{2}\d{3}. In this case this regex will be used for initial value detection and after when is question asked to user. With this you can set custom rules for variables.
You can alse use {key} system to fill variable default value or question. Like you have 2 paramater first one ask's the users name and the second one ask's user email you can define second question like Hello, {name}. Please provide a valid email for further contact.
Variable tojson
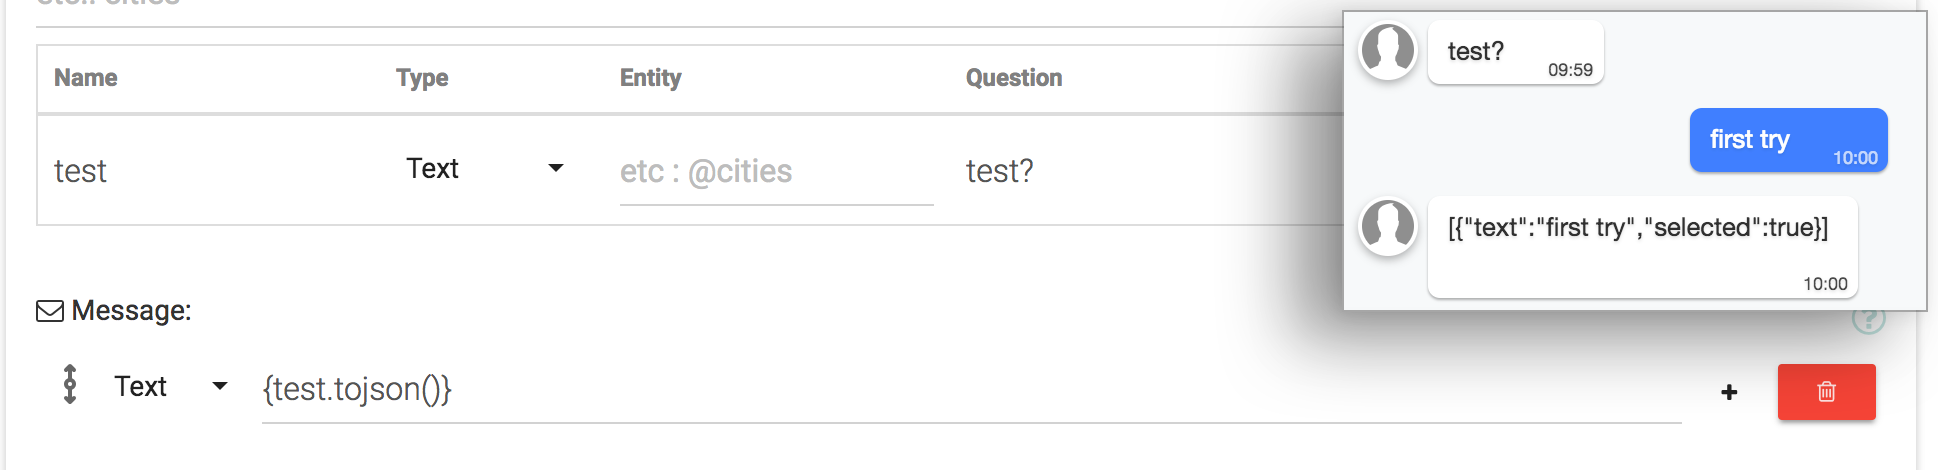
You can print value of variable to string with tojson helper. You just need to add .tojson() to end of variable name like {places.tojson()}. You can also output to operations.
Output

Output section is to define what will bot reply to user at the end of this intent. If you don't want to send a message at the end of this intent you can leave this section empty. There are couple of types of outputs like text, typing, image, video...
| Type | Description |
|---|---|
| Text | Plain text message type. |
| Typing | Sending typing... message and wait x sec before sending next message. |
| Array | Send a text message with a array of buttons. |
| Horizontal Array | Send a generic-template type message with cards. |
| Image | Send a image. |
| Video | Send a video |
| Custom | Send a custom formatted text. (for custom api and endpoint usage). |
You can create more than one output for the same intent. To do so just click the CREATE NEW OUTPUT button.
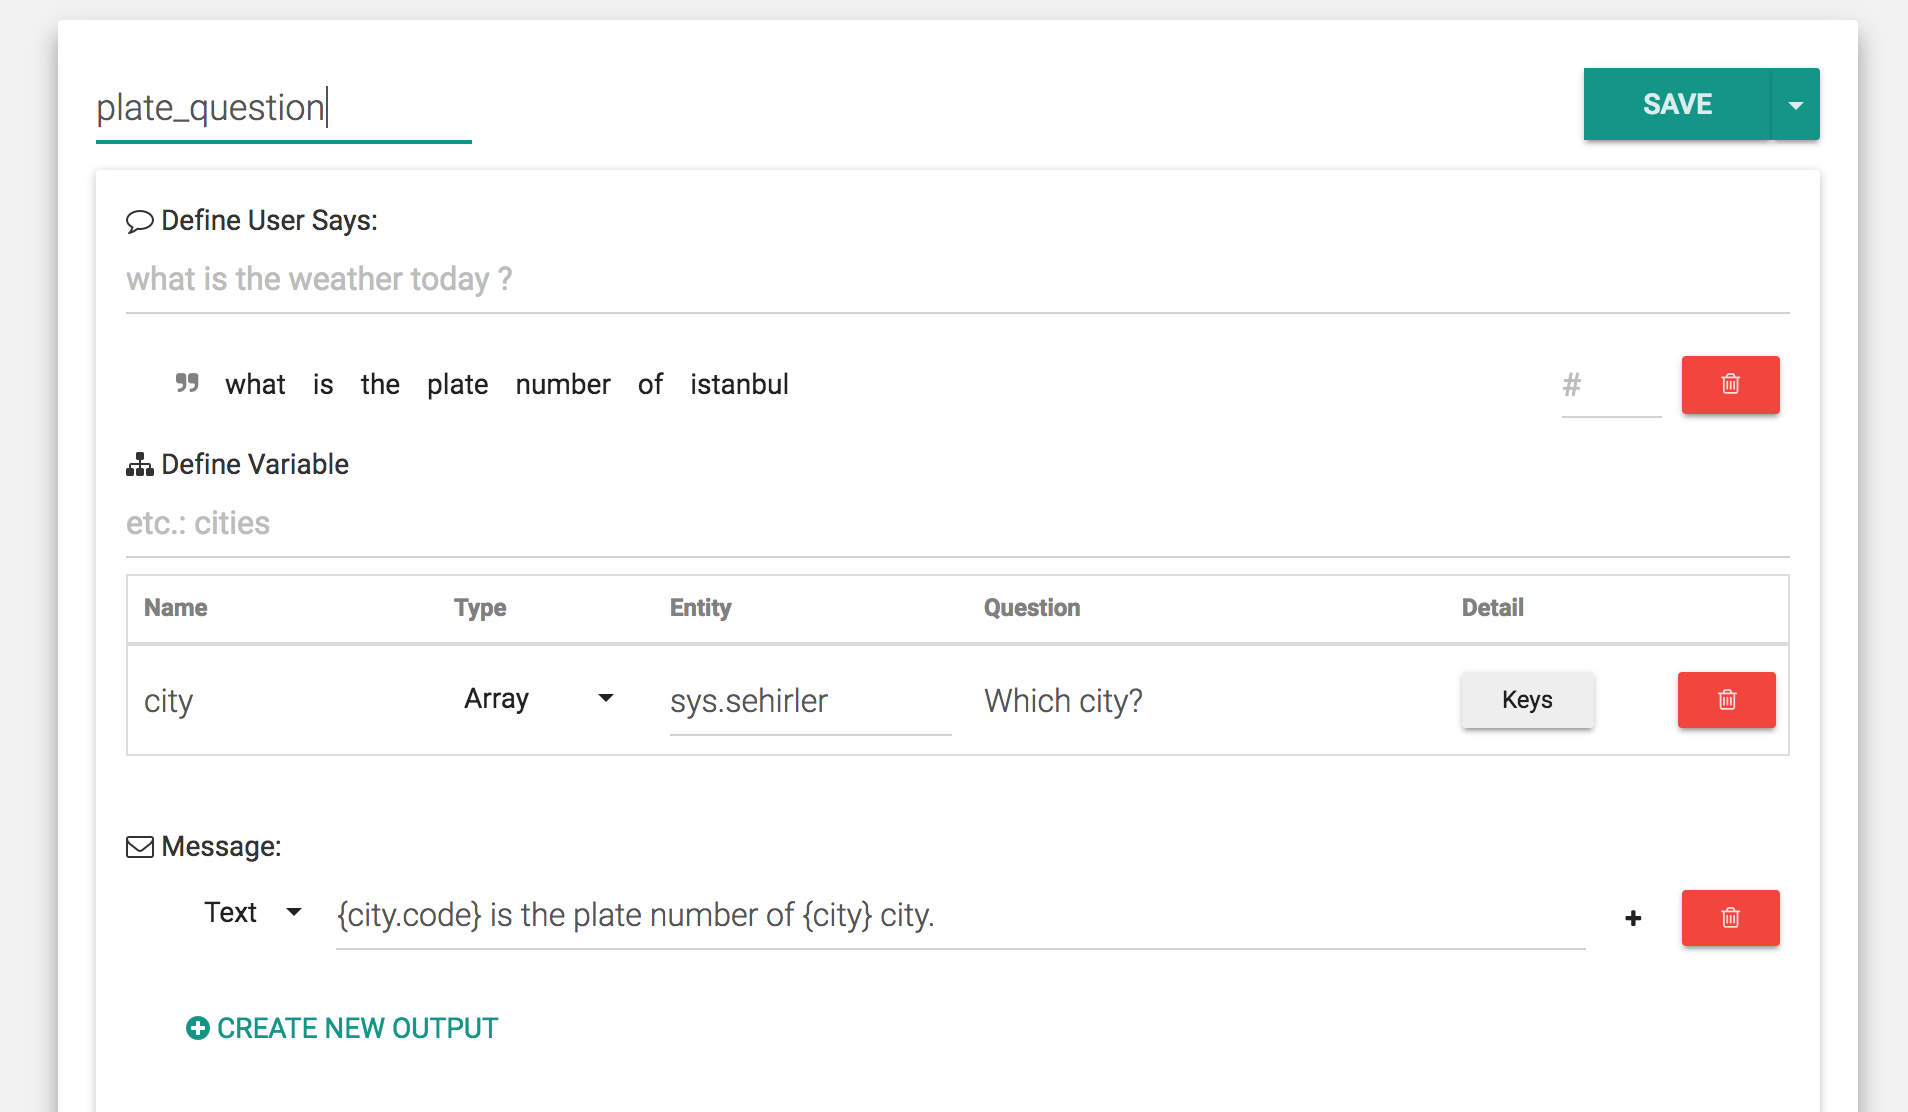
To use variables in your intent you can use {<key>}. For example if our paramater name is city. We can get city name in output like this Weather status for {city} is sunny. If you want to key-extra values you can chain with . like a normal json object. For example in our sys.city entity we have plate code for each city of Turkey in code keyword. We can use it like this {city.code} is the plate number of {city} city..
Or if you want to print something from GET or POST operation you can use return variable name like {return.name}.
Operation
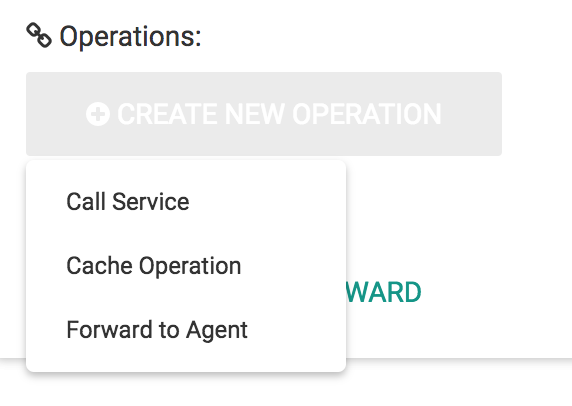
Operation is a way to trigger an external resource event or save to cache. There are two types of operation. These are as follow...
| Type | Description |
|---|---|
| Call Service | Get or Post web request operation |
| Cache | Save to cache a variable operation |
| ForwardToAgent | Disables bot and forward the conversation to agent waiting list. |
Call Operation
Try Get Screen
Json Picker Button
Json Picker Screen
How to use in output section
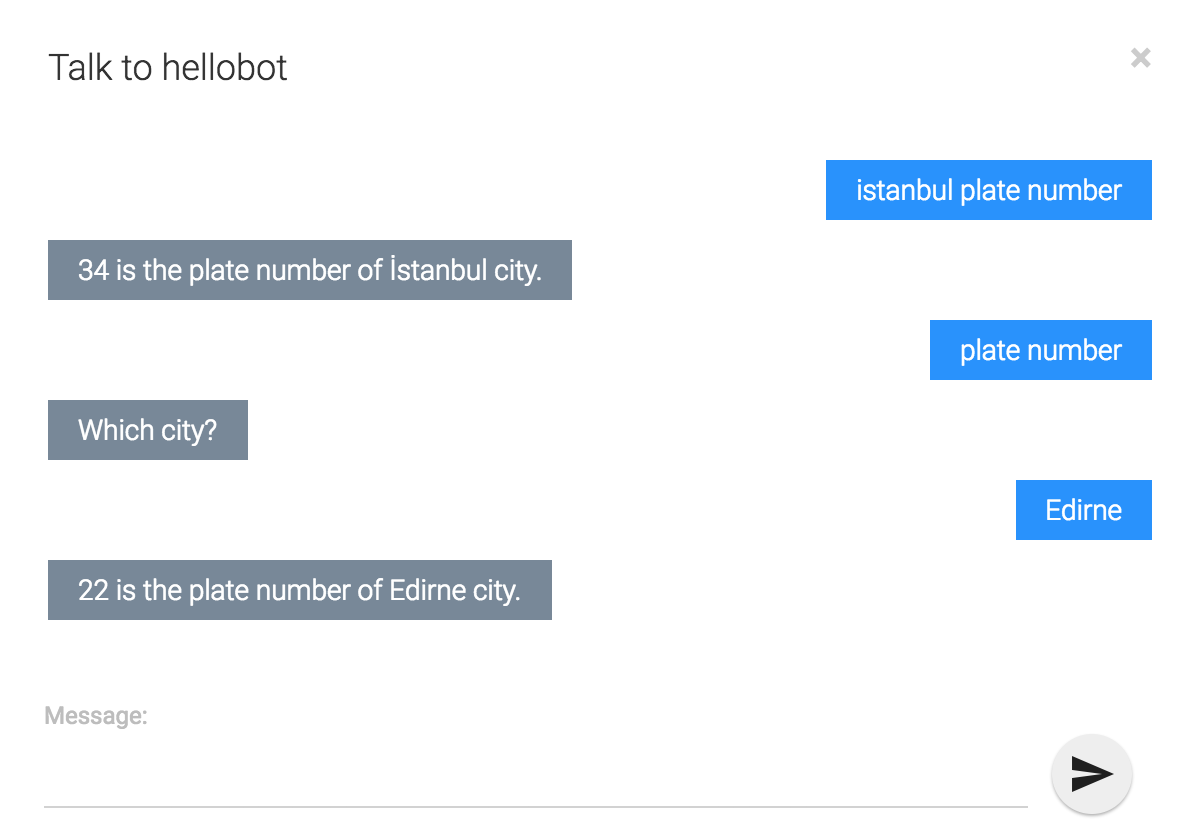
Demo test for this intent
Call Service is a way to interact with external resources or apis. There are two types of Call Service currently available.
| Type | Description |
|---|---|
| GET | GET Http request |
| POST | POST Http request |
In these operation types you can use following options
| Type | Description | Required |
|---|---|---|
| Uri | Http request url. Can use our variables here like http://jsonplaceholder.typicode.com/posts/{id} |
Yes |
| Headers | Json object as string to use as header. Example: {"content-type":"application/json"} |
No |
| Data | Json object as string to use as post body. Example: {"username":"test"}. You can also use our variable printing markup here like {"username":"{name}"} |
No |
| Try Get | A way to test your endpoint if it's working with our system | No |
In Try Get screen you can check if your endpoint is working correctly with our system. And save as example data to used in json-picker section. Json picker is a variable generator with gui. You can click the + button at the right of the text output to access to json-picker. After that you'll see a screen with mock data from your last try get.
Cache Operation

You can either set or clear a key in user.prop scope with this operation. To use this you need to define your key in first textbox and value in second textbox. For example; user.prop.lastKey and {{key}}. To use this value in intents you need to start your key with $ character like {{$user.prop.lastKey}}.
ForwardToAgent Operation
This operation disables bot in this conversation and puts the conversation agent waiting list.
Forward
Forwards are basicly for branching to the other intents with specific conditions or without any. With this, you can use power of modularity.
For example, you are asking users to their informations. After you get their infos, you want to trigger different intent lets say 'confirm' intent and only over 18 aged user should reach this intent. After it matched with our condition(s), then we will pass the this intent's paramater values to forwarded intent.
You can do it with 4 easy step and these are as follows...
Creating Forward Panel
- Press the 'Create New Forward' button.
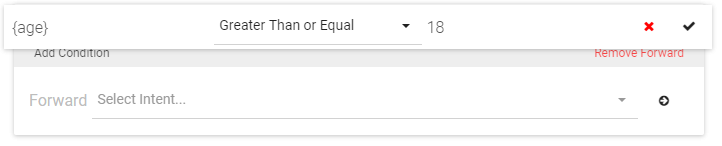
Adding Condition
Here we define our condition

- Press 'Add Condition' button
- Enter your variable (For our example : {age})
- Select your condition type (For our example : greater than or equal )
- Type your conditional value (For our example : 18)
- Confirm it
If you want to edit any condition after confirm, you can just click over the condition line then change any part of it.
Select Intent
- Select our desired intent (For our example : Confirm)
Passing Values
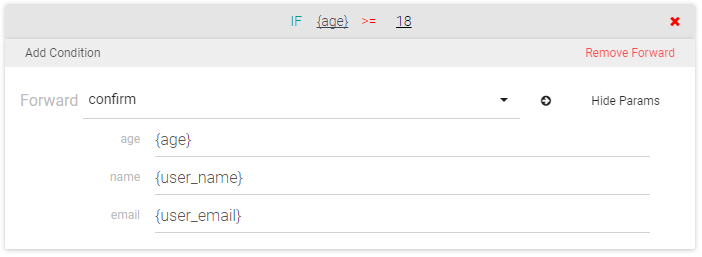
- Press the 'show params' button
- Enter your variable names or constant
Notes
We created one forward with single condition in our example but you can define multi forwards with multi conditions.
The important part is a forward section will only do forward only if previous forwards fails and its all conditions matches.
Entity
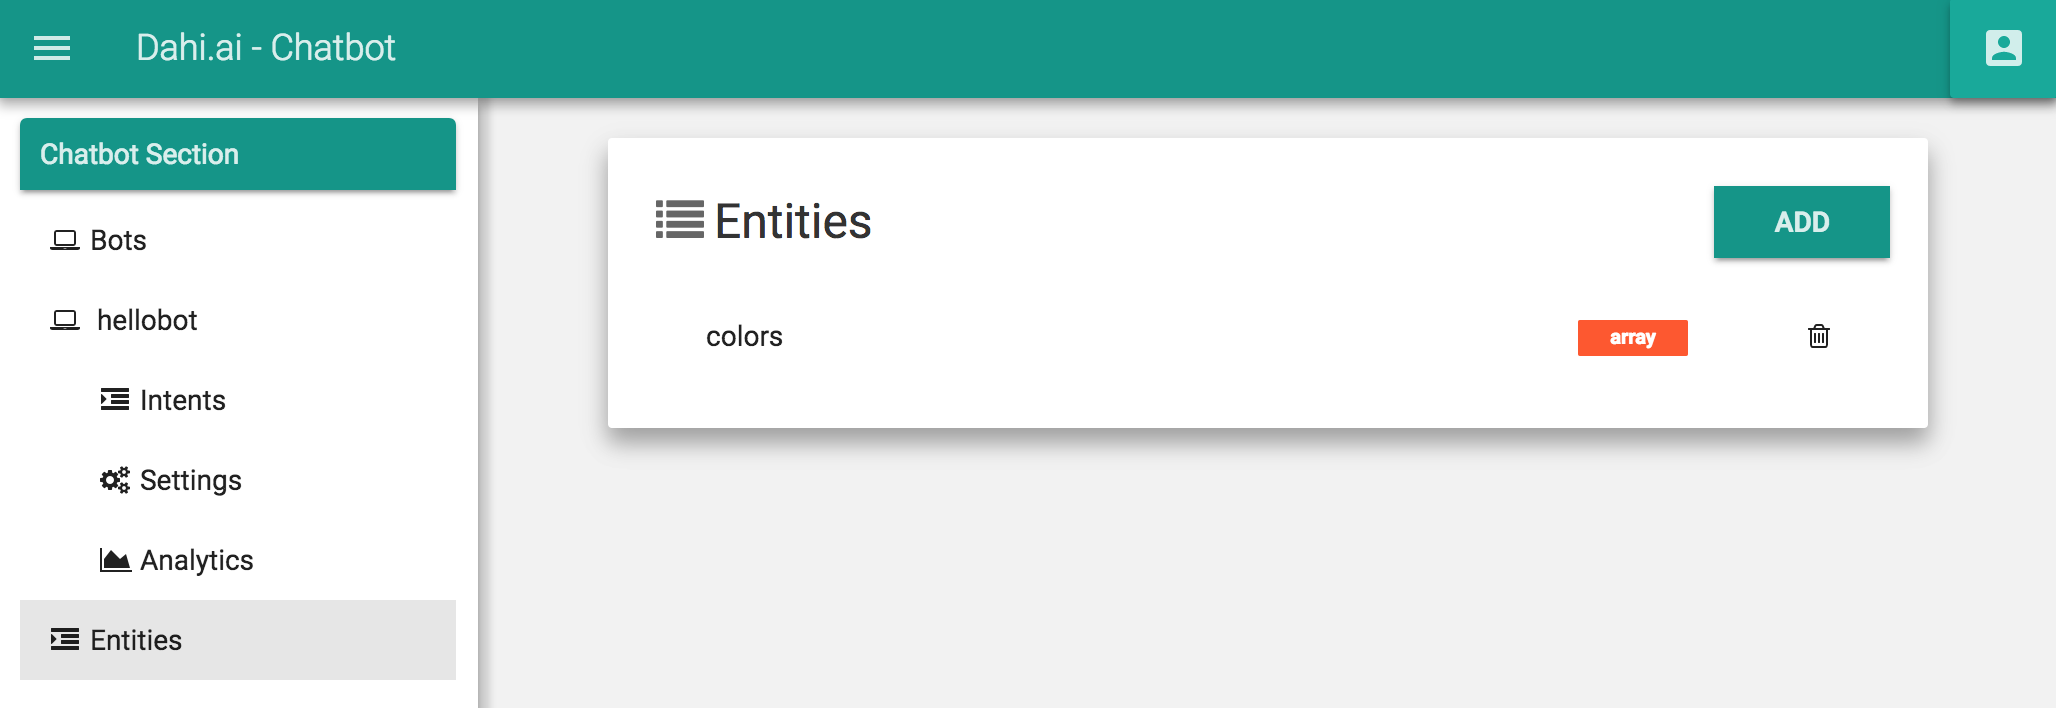
Entity is a list of object that our bot can use to recognize data or ask question.
For example; if we want to ask user which is their favaurite color. We can fill an colors named entity with all known colors and link it to the question with using intent paramaters.
There are currently two types of entity. Array and Horizontal, array is for any data list and horizontal for facebook generic-template outputs.
Add Entity
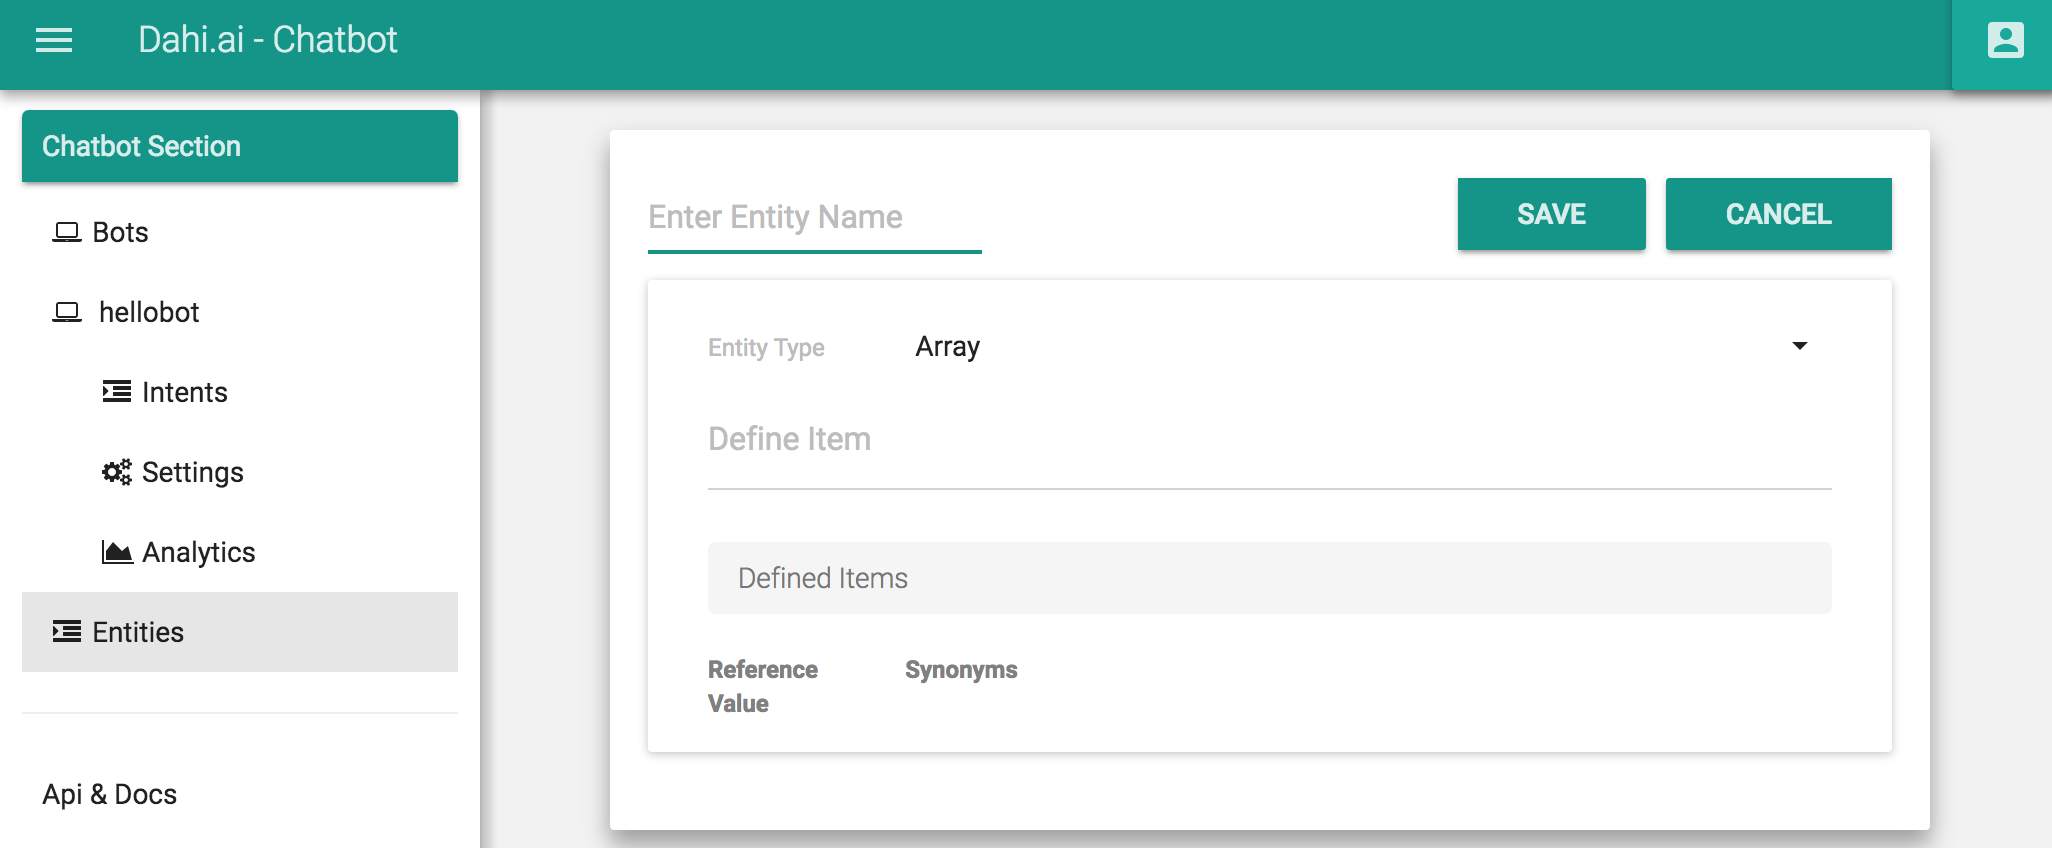
To add a new entity follow these steps:
- click to
ADDbutton at the right top corner in entity list page. - Type entity name at left top corner of section.
- Select which type of entity you want to create array(default) or horizontal. You can't change this after creating an entity.
- Type your data.
- Click
SAVEbutton to save it.
Edit Entity
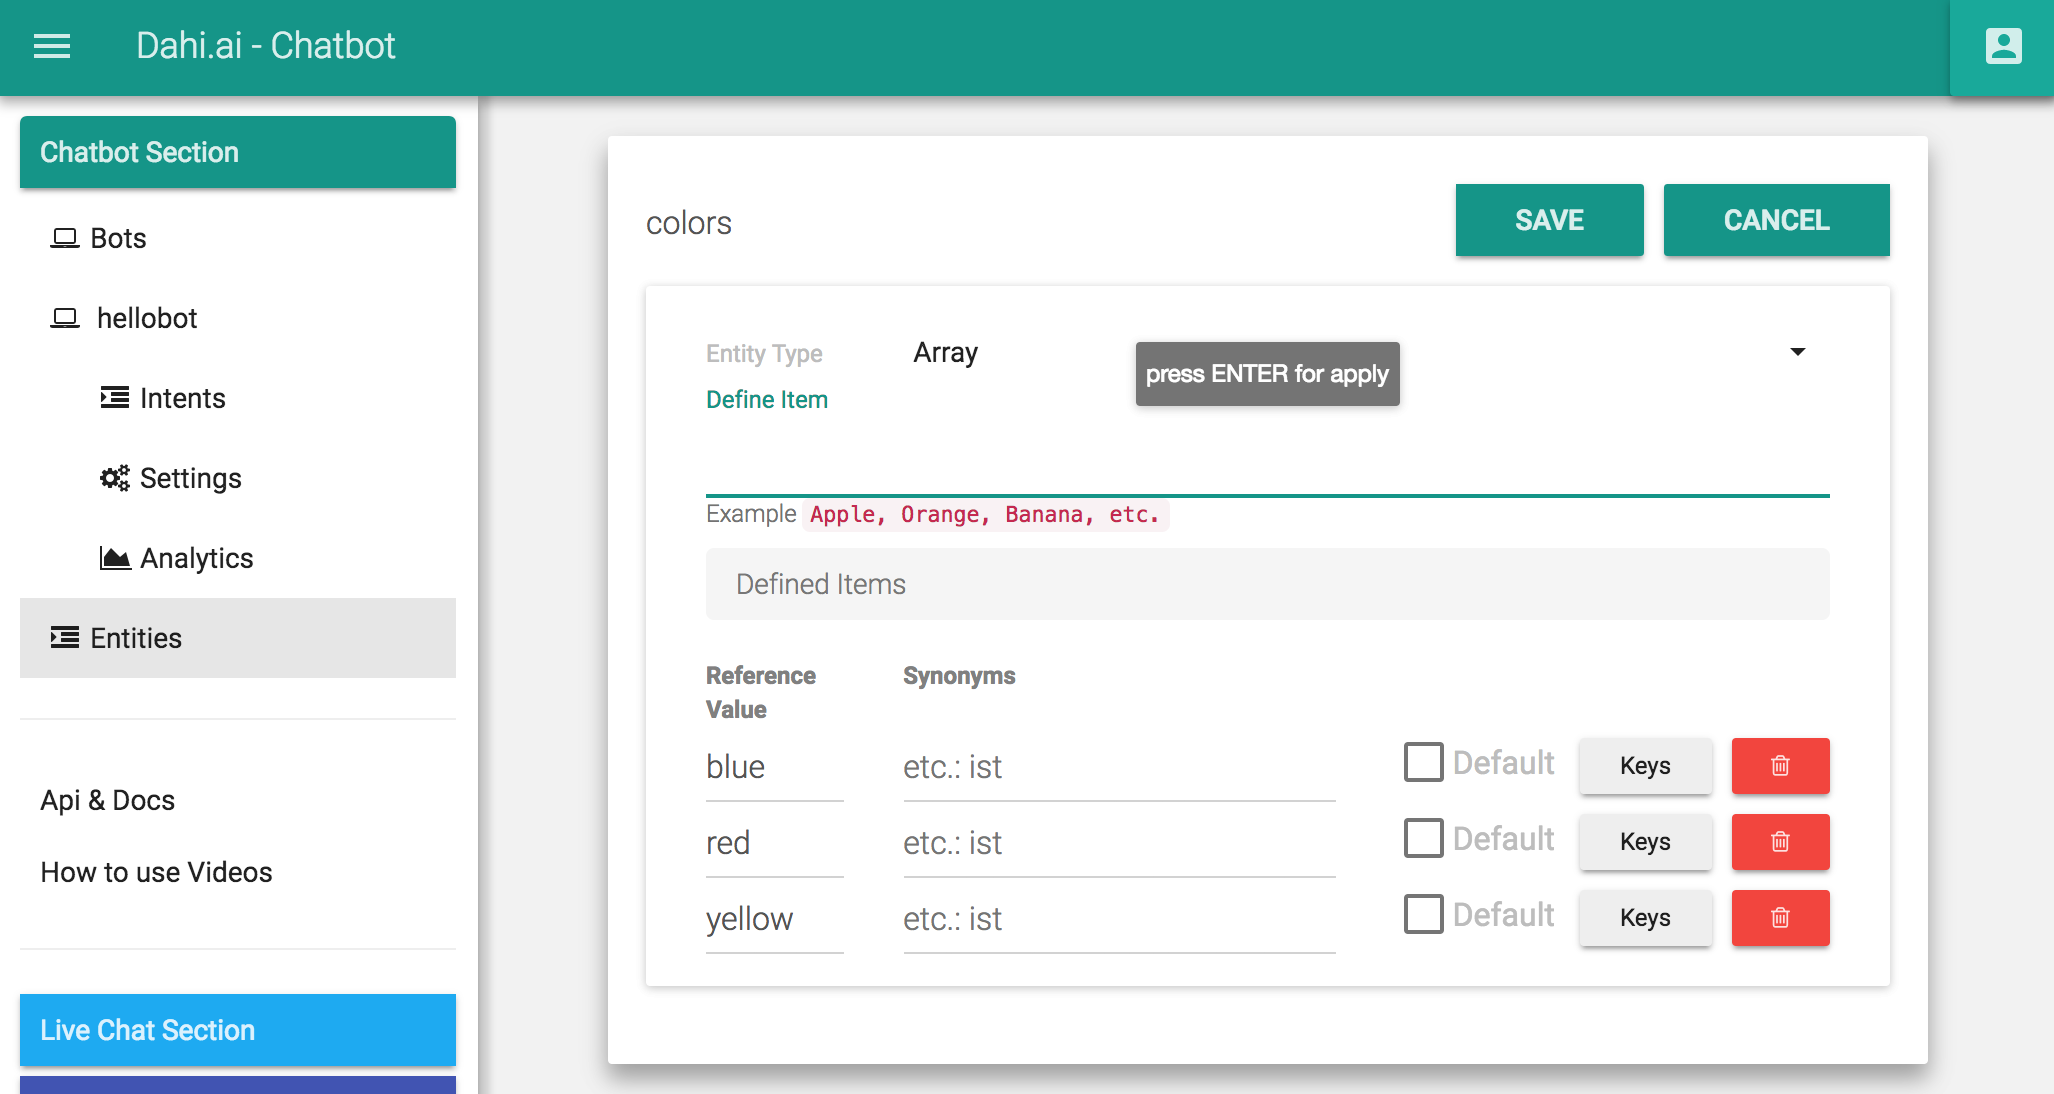
To edit an entity click it's name, then you can type any new text in to Define Item section and press enter to add it to the list.
In this screen you can also modify any item's name, sysnoms, keys or delete them if you want.
To save click SAVE button at right top corner.
Types
There are currently two types of entity. Array and Horizontal, array is for any data list and horizontal for facebook generic-template outputs.
Array
This is a text based list entity type. Can be used for array, text and multi-array type paramaters.
To add a new element type Reference Value that you want to add in Define Item section and press enter.
| Key | Description | Required |
|---|---|---|
| Reference Value | Display text value | Yes |
| Synonyms | Equivalents of value to detech for this element. | No |
| Default | is default repiresantation of entity | No |
| Keys | key-value pairs for this entity, can be used by chat-bot. | No |
Horizontal
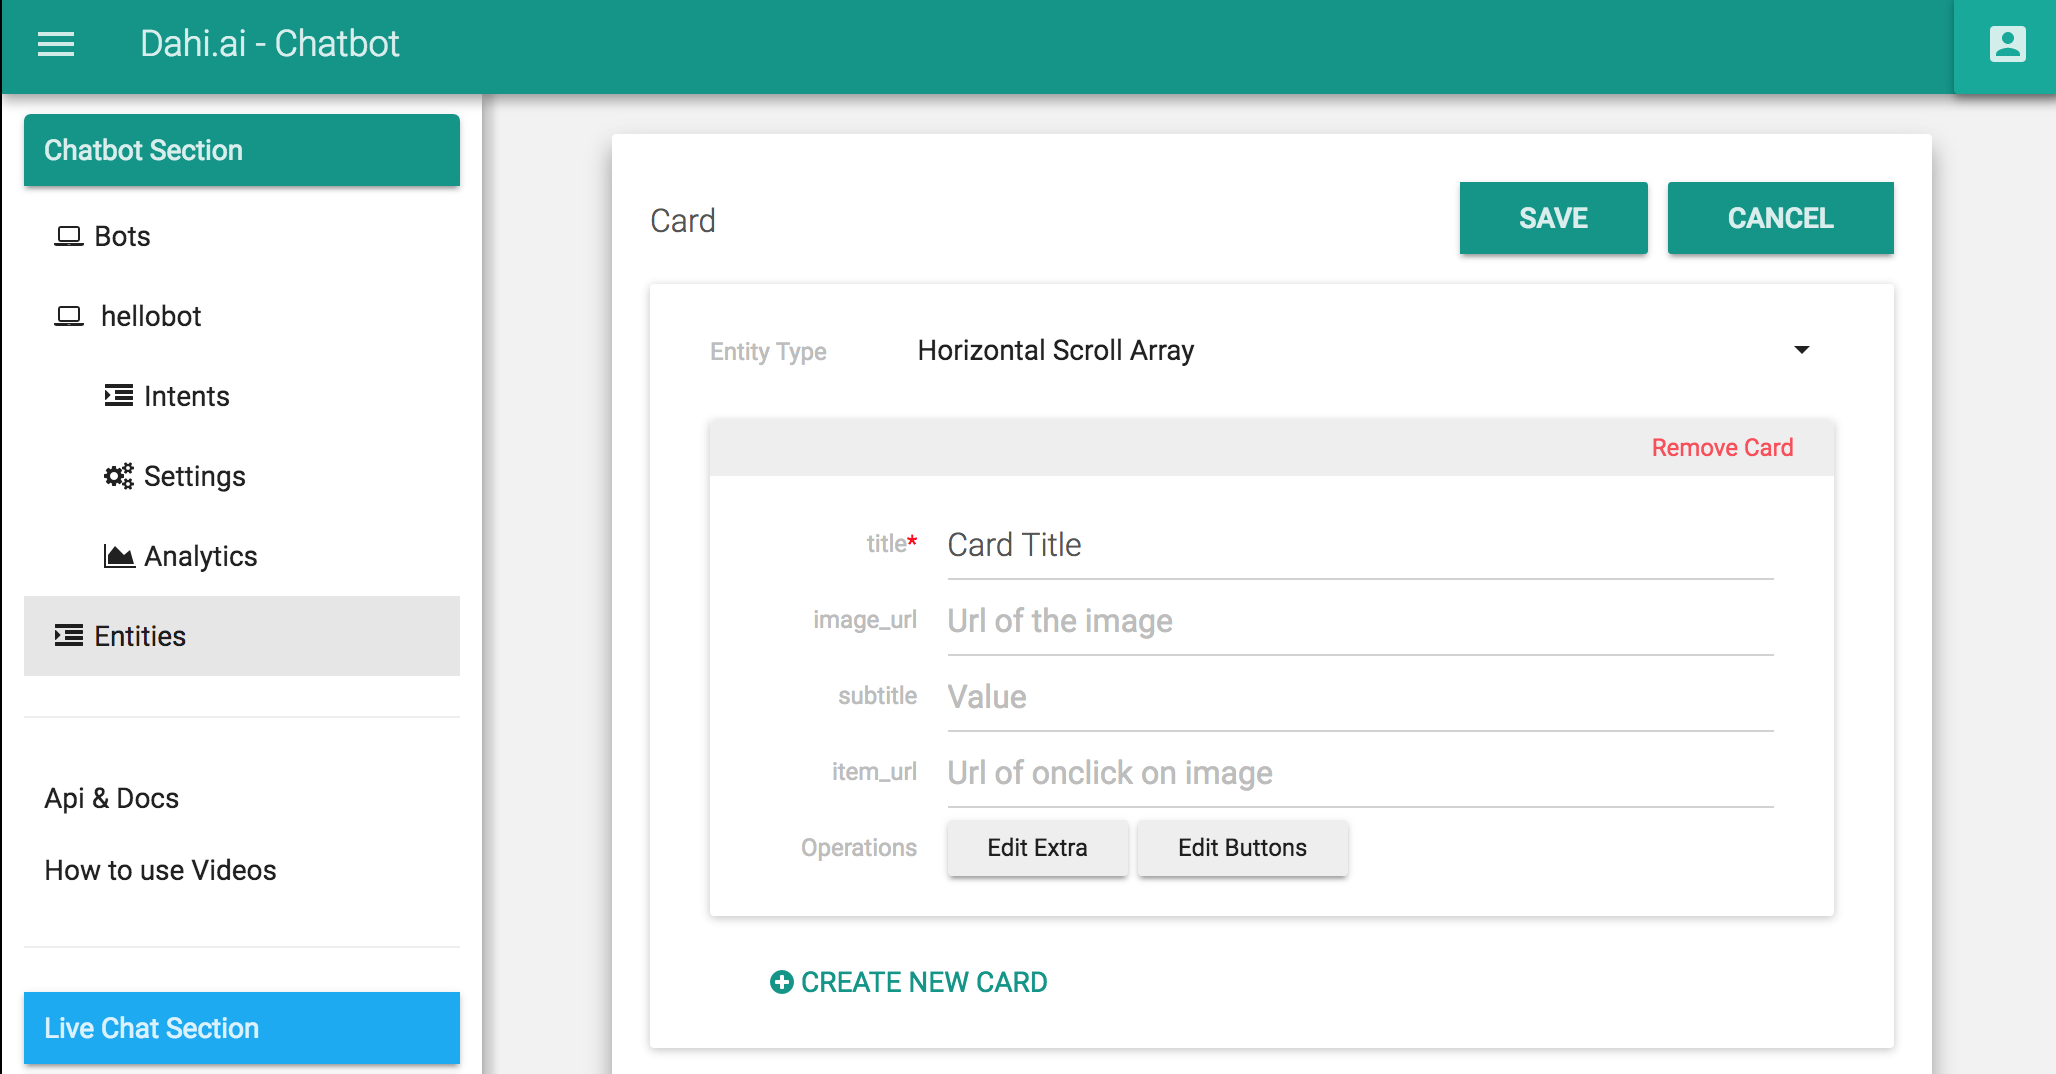
This is a horizontal card entity. Can be used for outputing generic-template messages.
| Key | Description | Required | Limits |
|---|---|---|---|
| Title | Title value for this card item. | Yes | 0-80 Character |
| Image_url | Image url for this card item. | No | Must be a valid image url. |
| Subtitle | Subtitle for this card item. | No | 0-80 Character |
| Item_url | Url to open if this card is clicked. | No | |
| Extra | key-value pairs to define values that can be used by chat-bot | No | |
| Buttons | Interactive buttons (open web wage, trigger intents, etc.) | No | Maximum 3 button |
Buttons
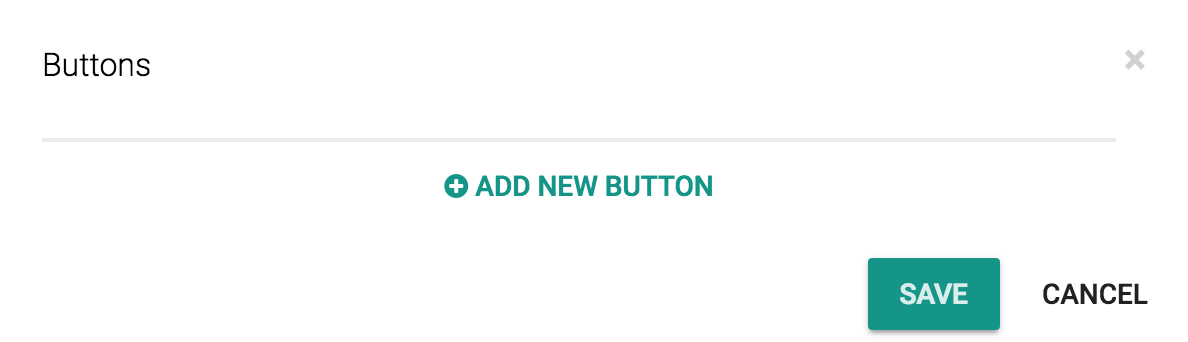
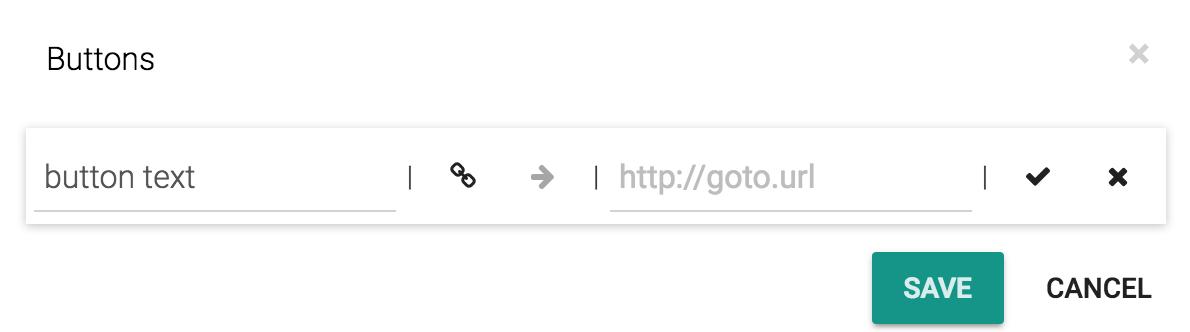
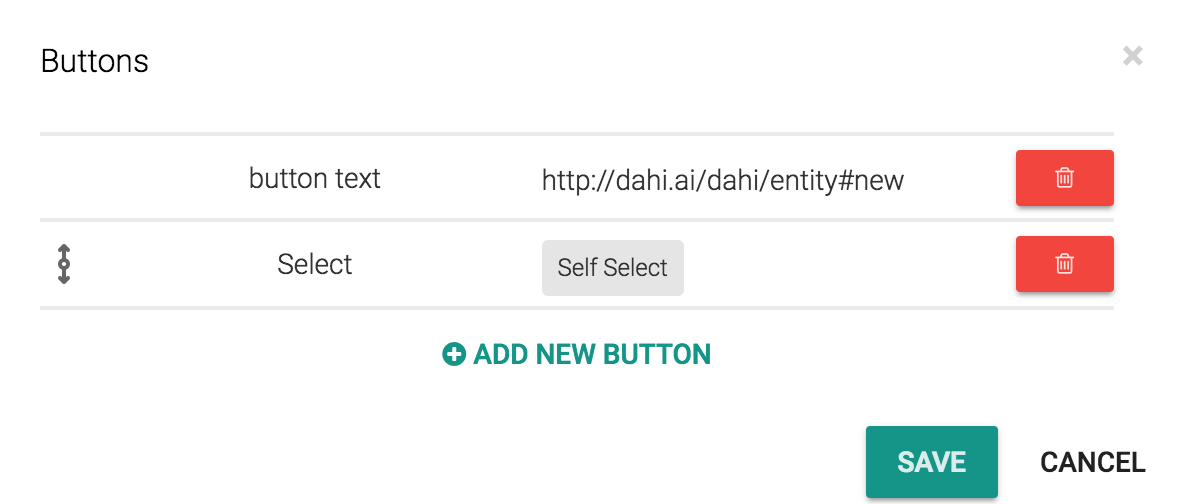
There is two types of buttons here. One is to open web url, second one is to trigger an intent. You can click to Add new Button button and configure what you want to add.
There are 3 things to chose when adding button. Button text, button type (web_url,postback) and value of the button. For web_url value must be web url. For postback you can chose a intent from combo-box. And click tick button to add button.
Some extra information:
- You can reorder buttons with holding hook at the left of the buttons and drag them.
- To edit buttons click over them.
- To delete button click red trash button.
- To change type of button click the url and arrow button at the center of button edit view. Arrow button represent payload type. Url button for web_url type.
Live
Live-Chat can be described as a messaging system. http://dahi.ai/live
Dahi.ai composed of two system first is chat bots. Second is messaging system aka. Live-chat. Live-chat is most easy way to provide a user integration system without any hurdle.
Also with live-chat's agent section you can use live-chat as a mix of chat-bot and customer service. With doing so your chat-bot can answer most of the user's questions and if it can't answer user's question can pass the conversation to agents.
Live-chat's some features;
- Provide a javascript chat script that can be added to any website.
- Connect a facebook page to chat-bot system.
- Feature to set when will chat-bot be active. (always or outside of work hours)
- Add wellcome message to your chat-bot.
- Can work with Chat-bot and Customer Service Agents at the same time.
Live Settings
In this section you can modify your live-chat, add agents, connect live-chat to a facebook chat and more. http://dahi.ai/live/settings
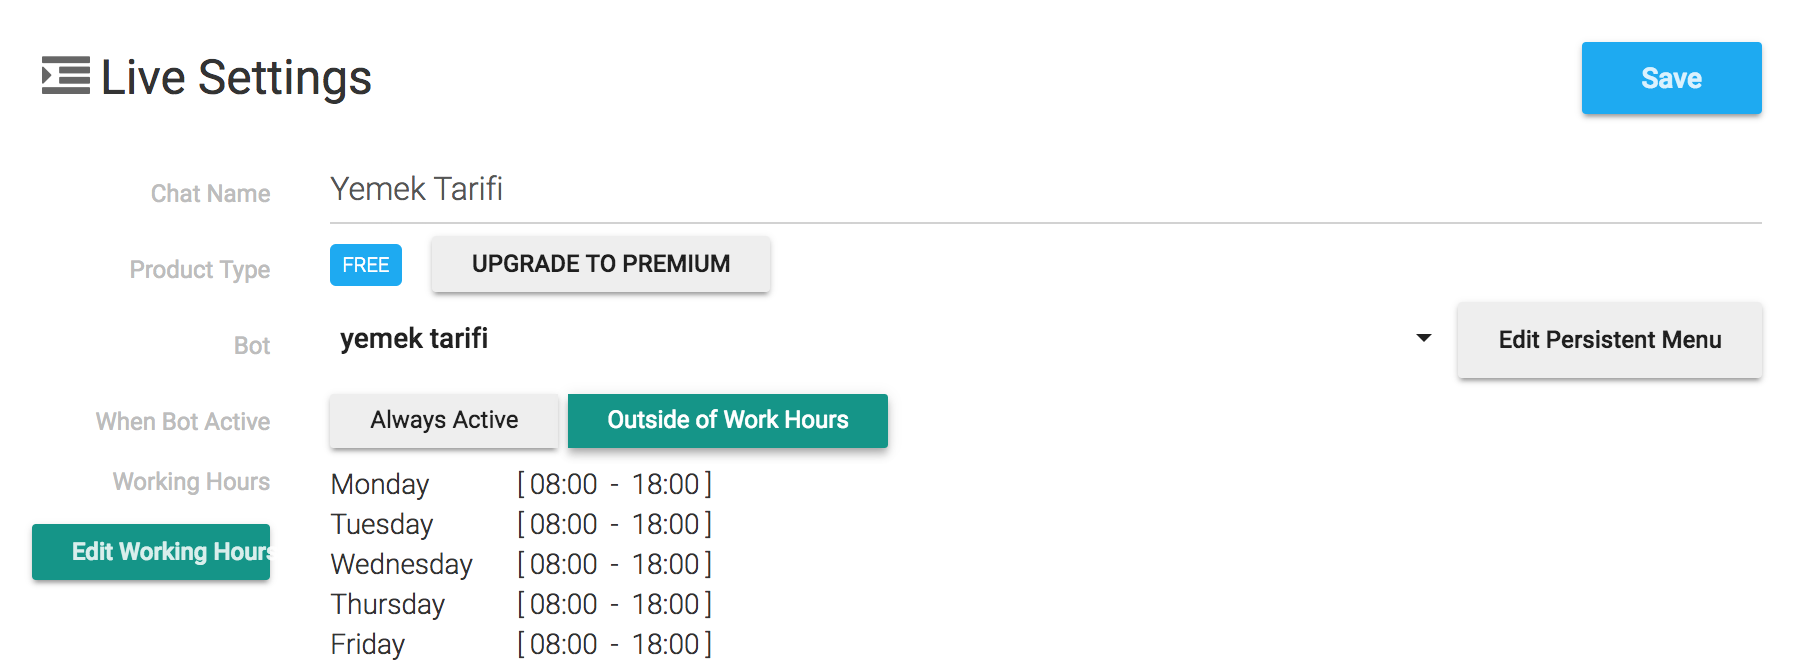
Main Settings
Main live-chat settings.
| Key | Description |
|---|---|
| Chat Name | Live Chat Name |
| Product Type | Your product's subscribtion tier. (Free or Premium) |
| Bot | Section to select which bot is connected to live-chat. You can select any of your chat-bot. |
| Edit Persistent Menu | Section to edit your chat-bot's shortcut menu. For More Information |
| When Bot Active | Section to select when will your bot will be active. Always or Outside of Work Hours (Hidden if bot isn't selected.) |
| Working Hours | Section to configure your working hours. (Hidden if Always Selected in When Bot is Active) |
Agent Settings
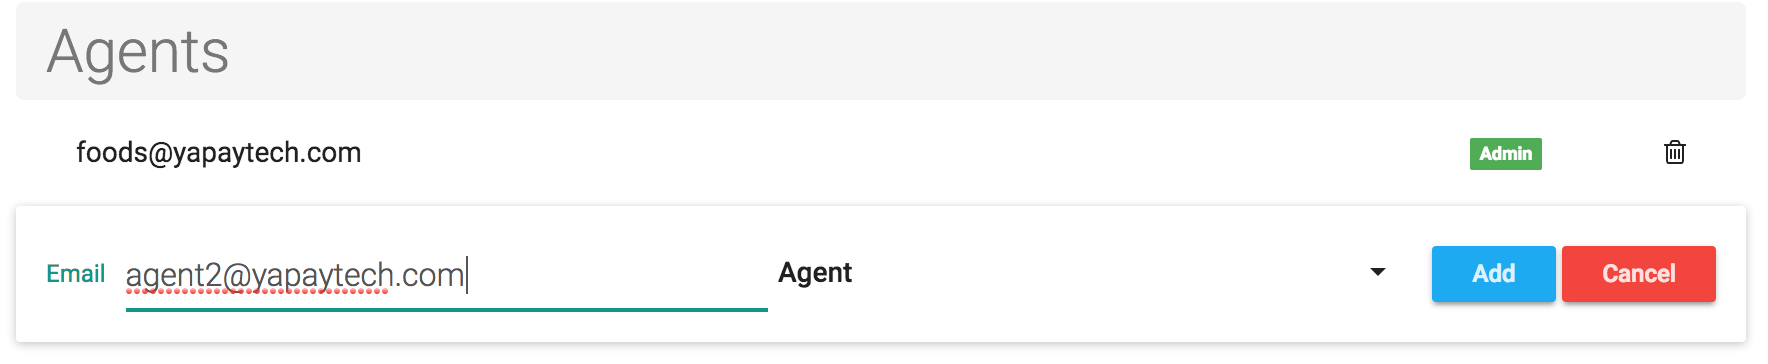
Where you can add or remove your live-chat agents.
To add a agent there are some requirements.
- You must be owner of the live-chat.
- The mail adress you're trying to add as a agent must be registered user of dahi.ai.
- The mail adress you're trying to add as a agent must not be owner or agent of another live-chat.
Adding an agent is easy;
- Click "Add New" Button at the right of the screen in agent section.
- Type the mail adress of user you want to add as agent.
- Click "Add" Button. And that's it.
Live-Widget Script

This is the script you can use to add a live chat that your visitors can use to chat with your chat-bot or agents. Click "Copy to Clipboard" and paste the script inside your website's body.
Live-Widget Script Settings
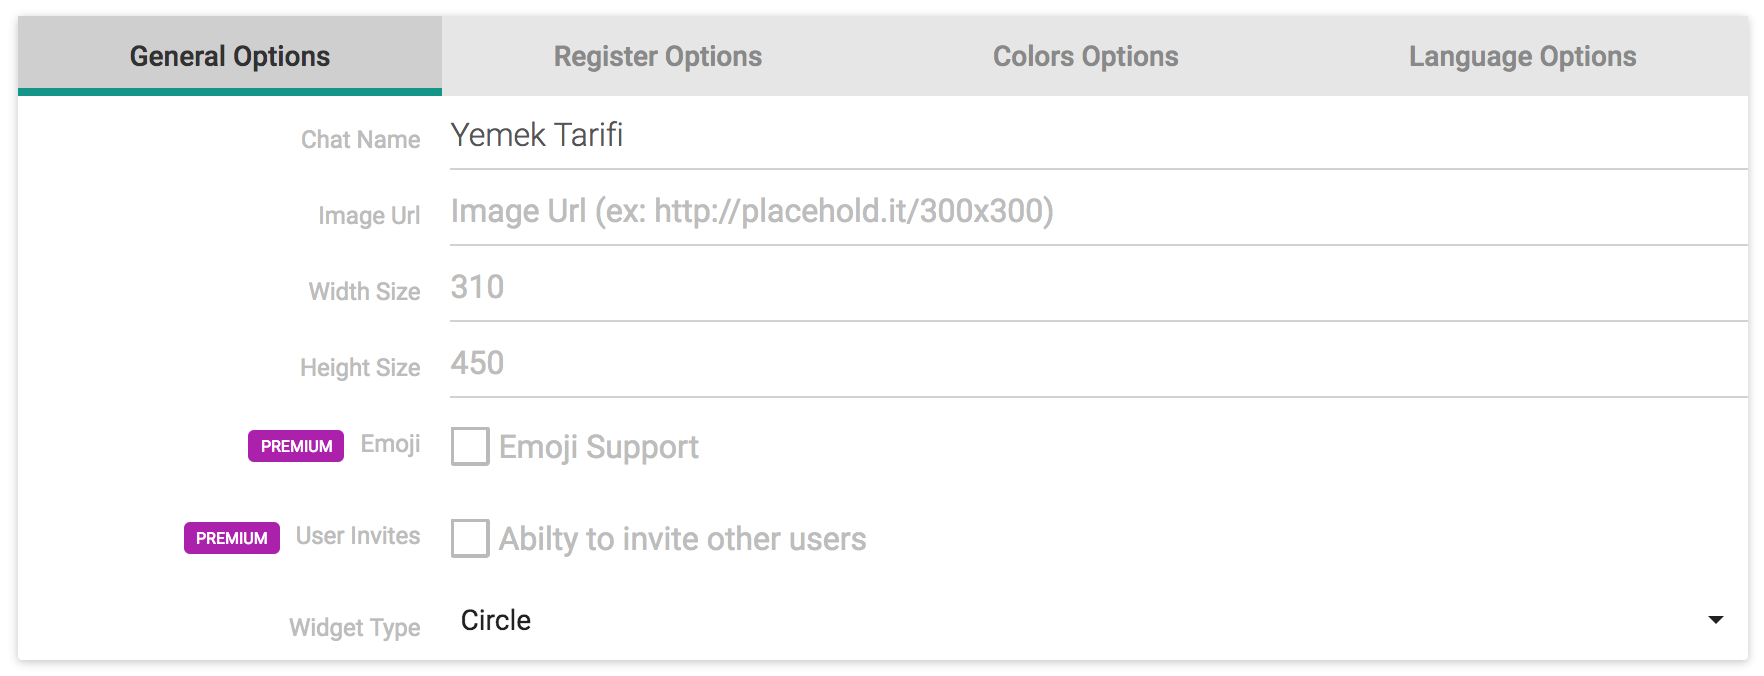
General Settings
| Key | Description |
|---|---|
| Chat Name | Live-chat name that shown to user in live-chat script. |
| Image Url | Live chat user image that shown to user. |
| Width Size | Live chat script width size. (px) |
| Height Size | Live chat script height size. (px) |
| Enoji | Add abilty to send emojis in live-chat |
| User Invites | Add abilty to invite other users to chat. |
| Widget Type | Widget type. Currently cirle or widgetbox. |
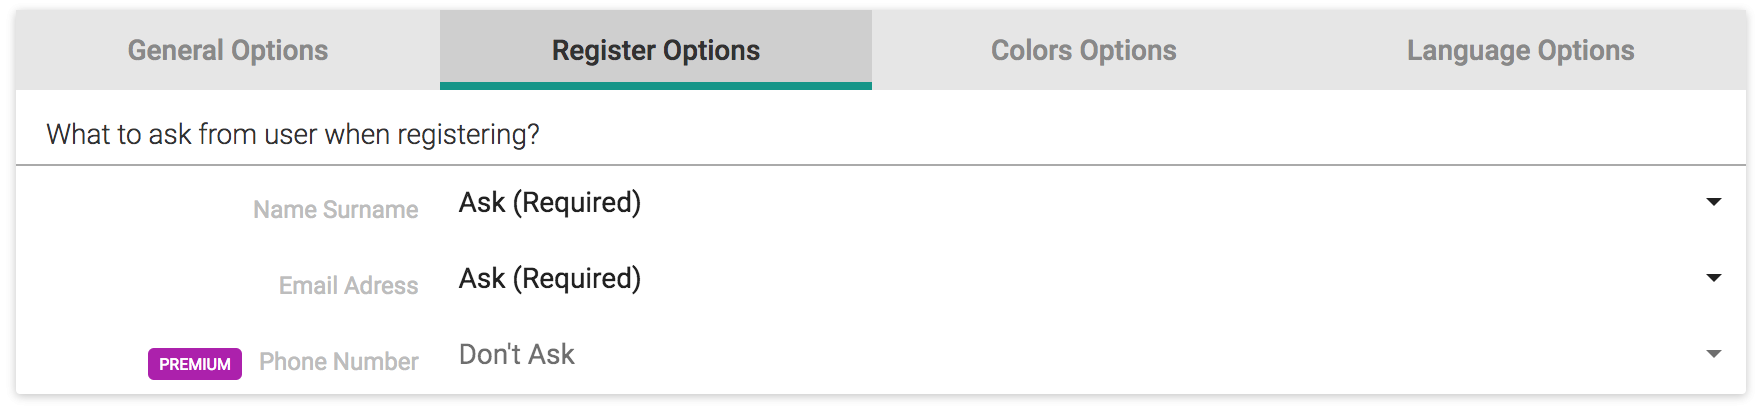
Register Settings
| Key | Description |
|---|---|
| Name Surname | When chat start should live-chat ask for user's name setting. |
| Email Adress | When chat start should live-chat ask for user's email setting. |
| Phone Number | When chat start should live-chat ask for user's phone number setting. |
Color Settings
Where you can change live-chat color palatte.
Language Settings
Where you can change live-chat language options or placeholder texts.
Facebook Integration
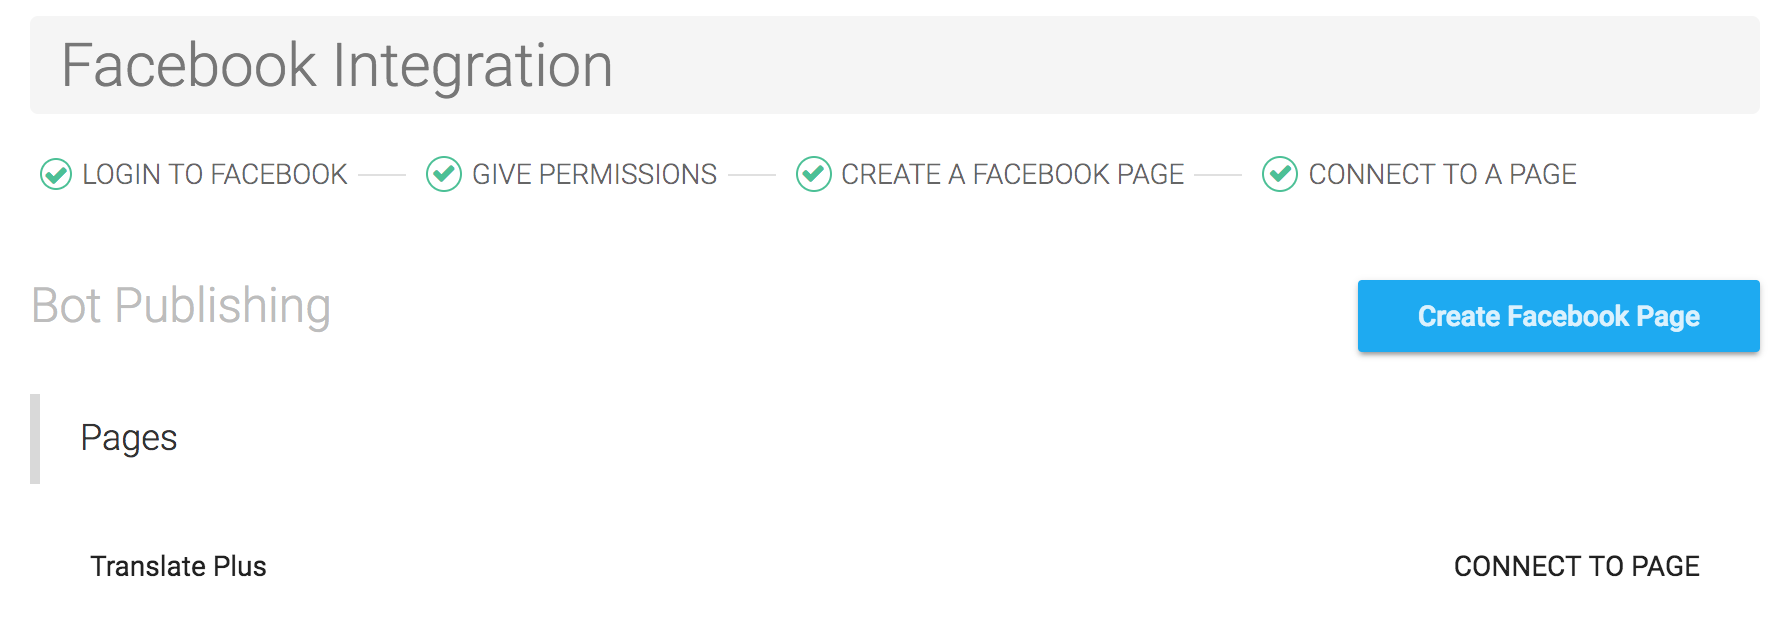
Here you can connect any of your facebook page to live-chat. Any message that your page recieve will be forward to live-chat and vice versa. In live-chat agent section you can view and response to messages your live chat recieve. Or if your live-chat has any chat-bot connected, it will automaticly reply to your customer's questions. This is the easiest way to connect your chat-bot to any facebook page.
To connect a page to live chat follow this steps.
- Connect to facebook.
- Give permissions to Dahi.ai Chatbot.
- Click the "Connect to Page" button at the right of the page list.
Live-chat Test Page
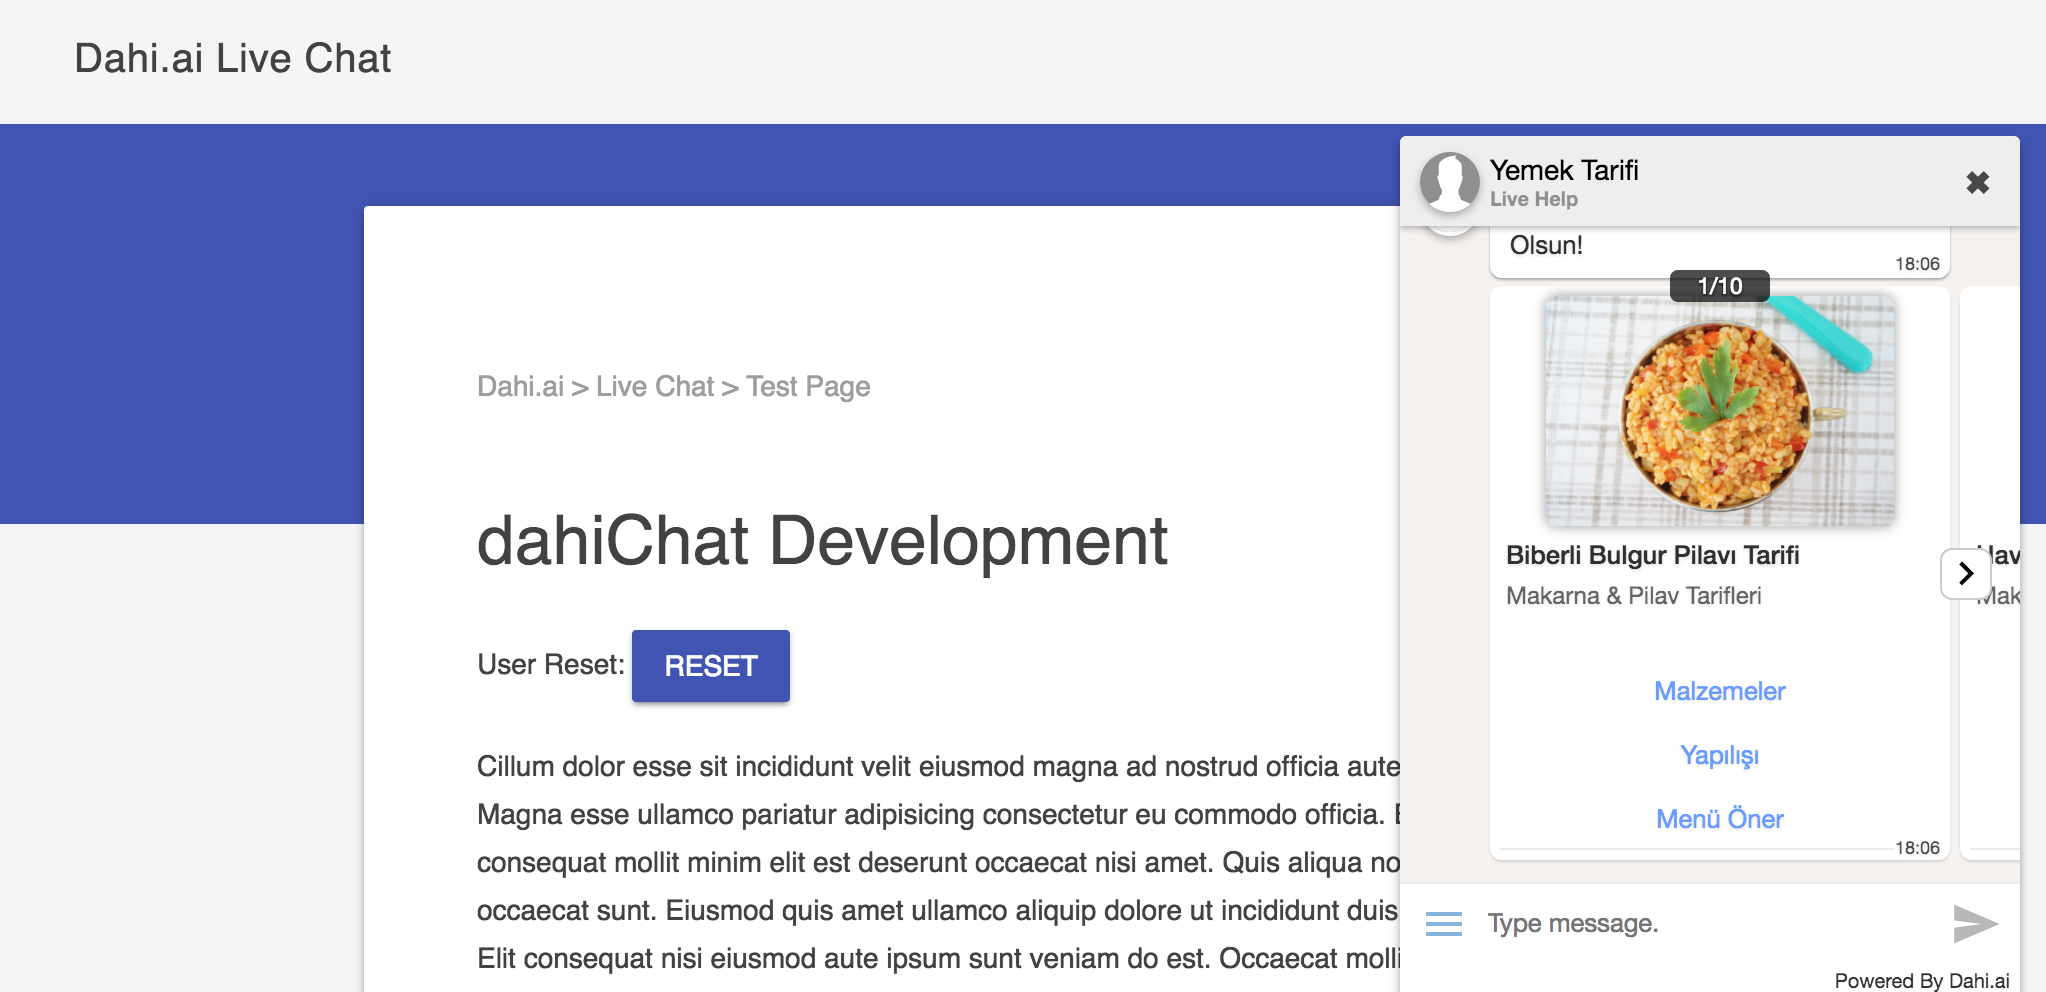
In the live-chat settings page at the right bottom corner of your screen you will a "Go To Your Client Test Page" Button. This will open a page where you can test your live chat and simulate an user interaction.

With this you can test your script and chat-bot before you add it to your website or facebook page.
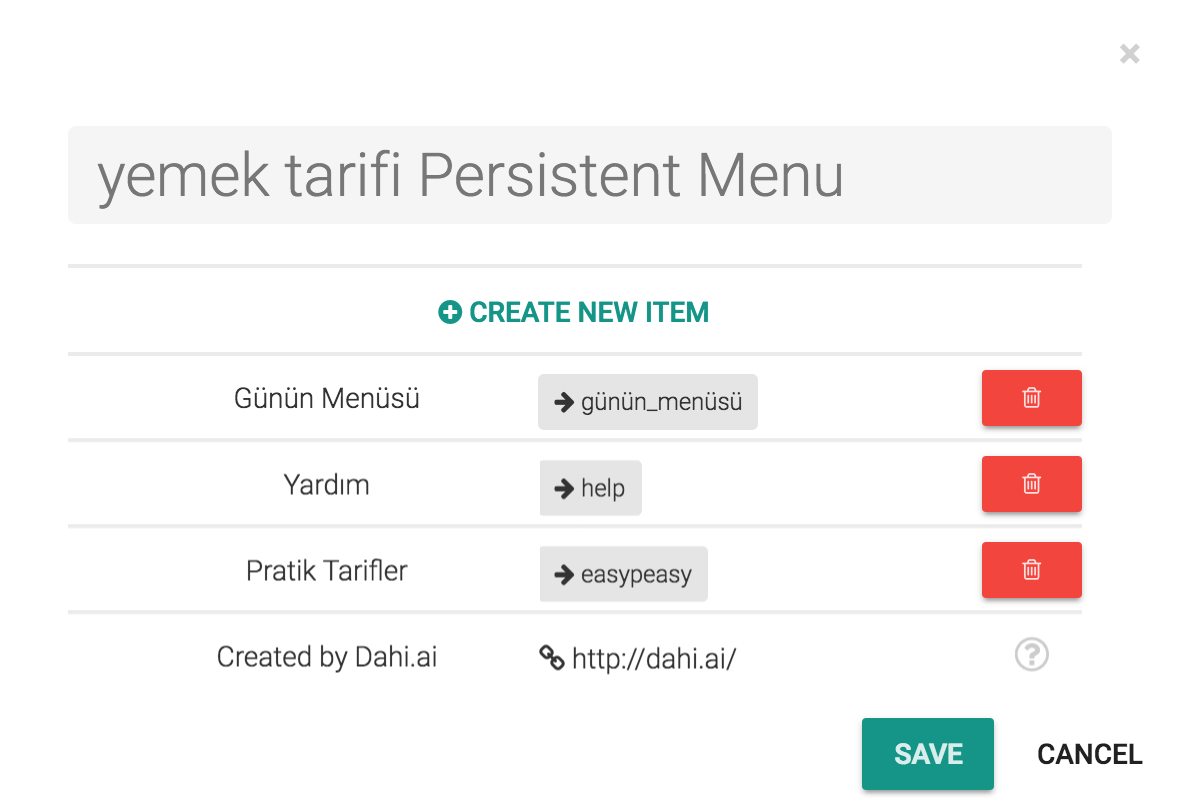
Persistent Menu
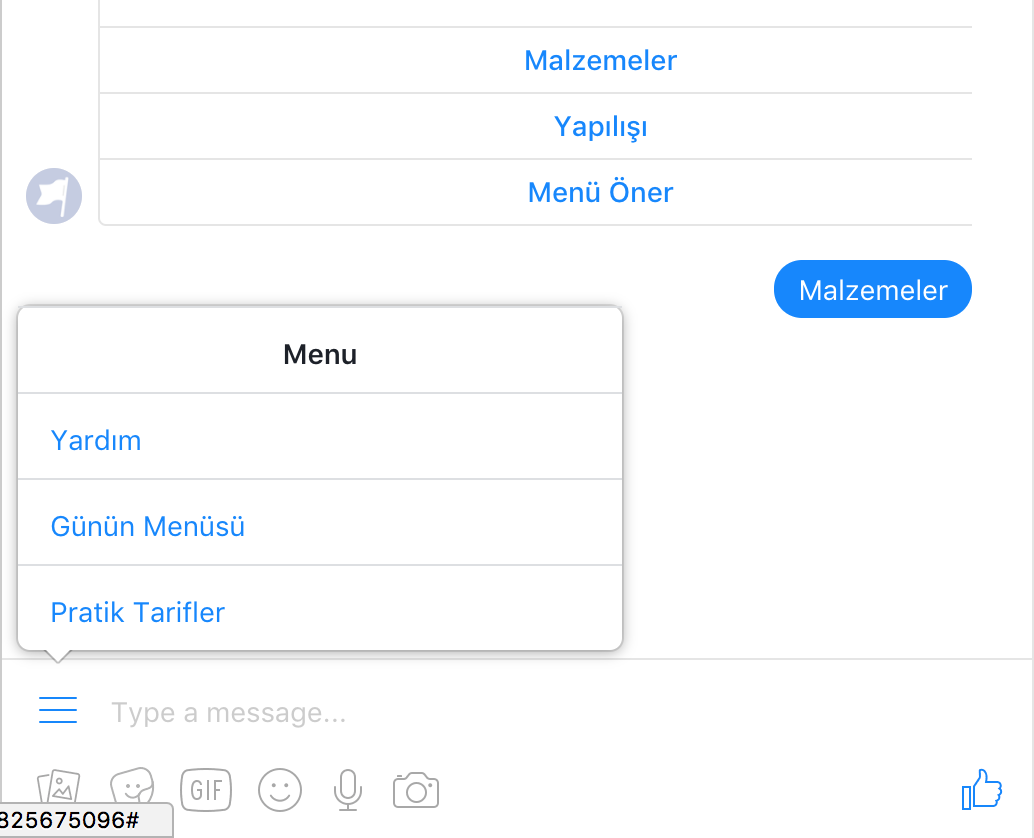
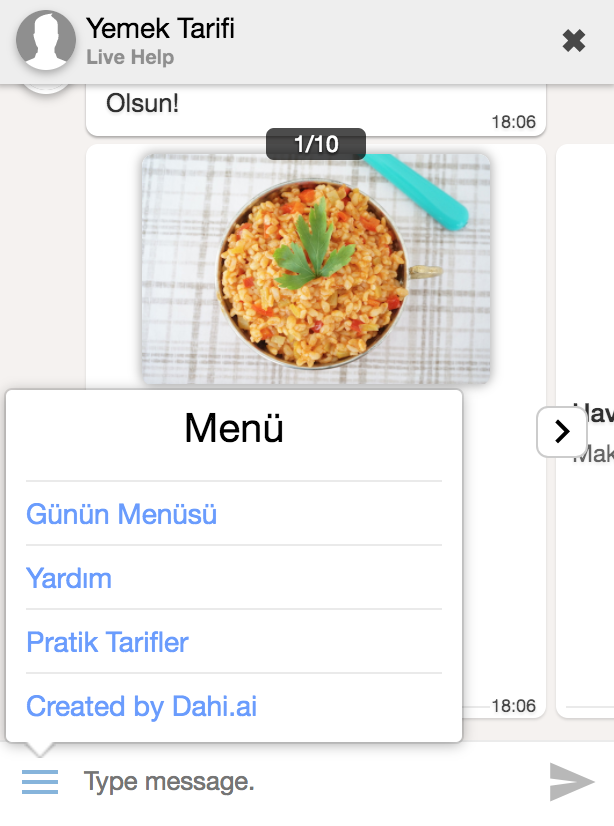
Persistent Menu is a way to add shortcut buttons to live-chat and provide user with some go to options. You can add payload or web_url buttons in persistent menu.
Payload buttons will trigger an intent start event when user will click on them. With this button you can add some shortcuts to your intents.
Web_Url buttons will trigger an open web-view event in mobile and open url in new tab in pc. With this you can forward your users some external sites or resources like when an user want to buy your latest song you can put a link to your itunes page here.
Some extra information
- Persistent Menu is supported both by facebook messenger and live-chat script.
- You can have maximum 3 buttons in facebook.
- You can reorder your buttons using hook at the right of the buttons in persistent menu editor. (visible when mouse is hovered in a line)
- Support for more button and nested buttons are in development. When it's ready we'll be updating this editor section.
Live Agent Panel
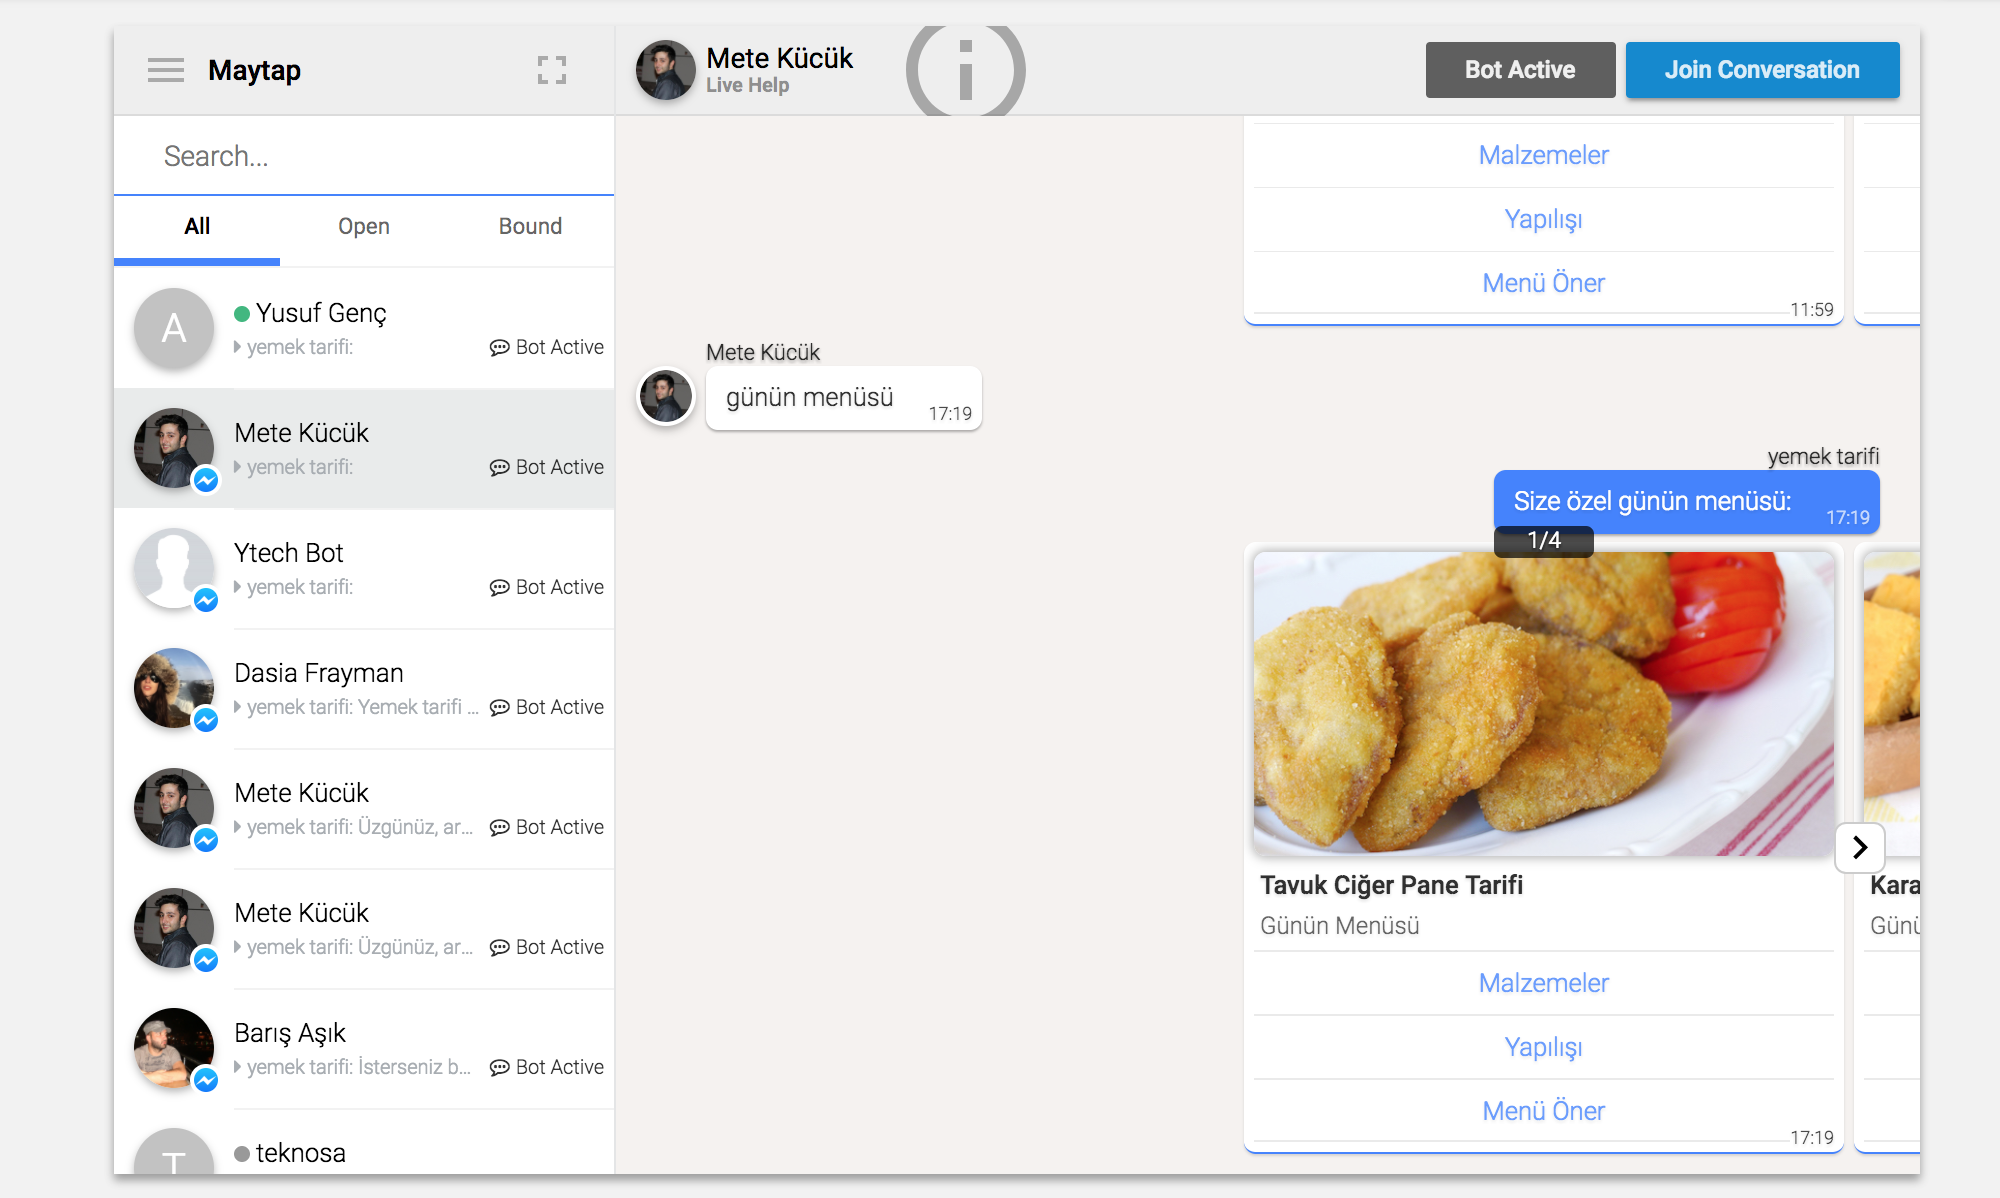
Live Agent Section is where you can see your live-chat conversations, join them to answer user's questions where your bot is not able to or see whether your chat-bot did stuck at some type of questions.
This is where you and your agents can interact with live-chat and your customers.
Here you can select an user at the right of the screen and see their conversation history. If you want to join the chat and answer instead of chat-bot you can click the "Join Conversation" Button at the right top corner of the panel. And when you want to give back the conversation to chat-bot just click the "Leave Conversation" Button.
At the right of the screen you can see 3 tabs at the top of the users list. You can use this options to filter users.
- All: Every user that is currently is talking to bot or you.
- Open: Every user that is currently is talking to bot or no-one.
- Bound: Every user that is currently is talking to you.
If a conversation is bound to any agent, bot will not answer any question that customer is asking. So to enable bot again either you should leave conversation when you don't want to talk to the user anymore or end the conversation if you think is user won't be asking any more question anytime soon.
Some extra information
- At the right bottom corner of user images in user list you can see which platform user is coming from.
- At the left of the names of user in user list you can see if the user is online or not. (green for online, grey for offline)
- If you click the big (i) button or name of the user at the top of the message panel you can see more information about this user.
- At the left of the join button you can see if the current conversation is bound to whom or is bount to bot or not.
Live Analytics
Here you can find some usefull information about your live-chat bot and usage information. Currently this section is in development.
Api
To use our endpoint you need to use this code:
curl -X POST \
  http://api.dahi.ai/dh/bot/tkn/59fff527e4b0cf33abf0c959 \
  -H 'content-type: application/json' \
  -H 'x-requested-with: XMLHttpRequest' \
  -d '{"recipientId":"user_id" , "message":{ "text":"yemek","type":"text"}}'
Make sure to replace
user_idwith a user_id and59fff527e4b0cf33abf0c959with your bot id.
# request body example, (message.text is required)
{
  "recipientId": "user_id",
  "message": {
    "text": "message_text",
    "type": "text"
  }
}


# response body example, there are more information that is removed from this example.
{
  "result": {
    "messages": [{
      "type": "array", // Message Type
      "values": [ // Buttons for array type message
        {
          "text": "Dışarıda Yemek İstiyorum",
          "extra": {
            "kisa": "Dışarıda",
            "payload": "59fff930e4b0cf33abf0c984_16"
          }
        },
        {
          "text": "Burada Yemek İstiyorum",
          "extra": {
            "payload": "59fff930e4b0cf33abf0c984_17"
          }
        }
      ],
      "text": "Nerede Yemek İstersiniz?" // Message Text
    }],
    "conversation_id": "conversation id"
  }
}
You can use our dahi.ai chat-bot platform with our endpoint.
You can learn your bot's bot_id (bot token) from bot settings page.
http://api.dahi.ai/dh/bot/tkn/{bot_id}
From response result.messages array is the response messages array.
Template
What is Template
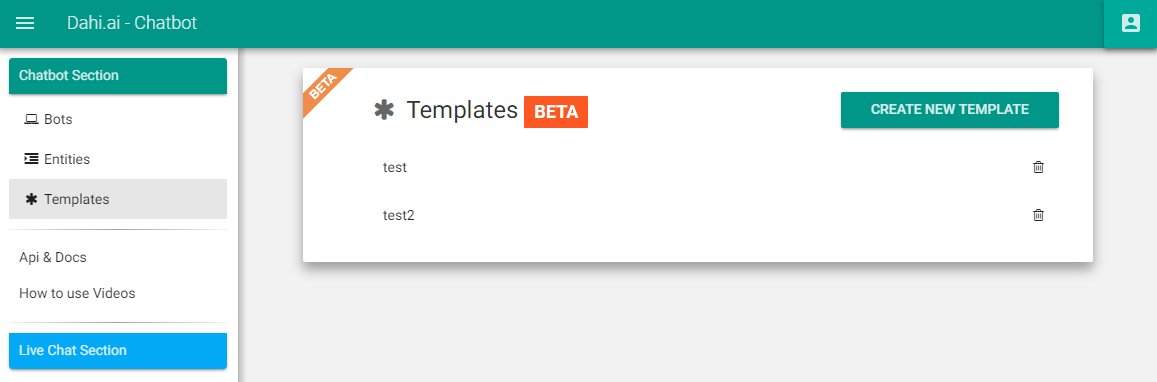
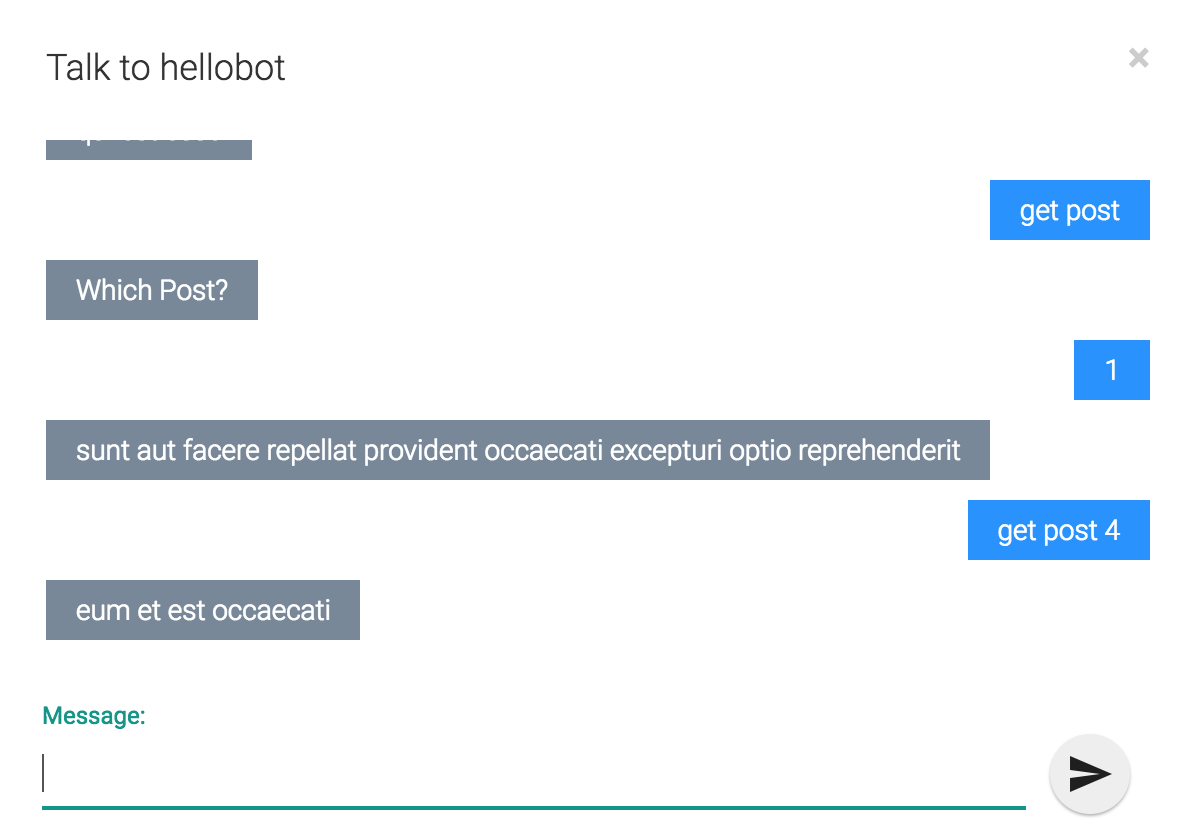
Template is a way to create message data that supported by dahi.ai. If you want to create a horizontal scroll array message from your REST api data, you can use template feature to create a middleware REST api.
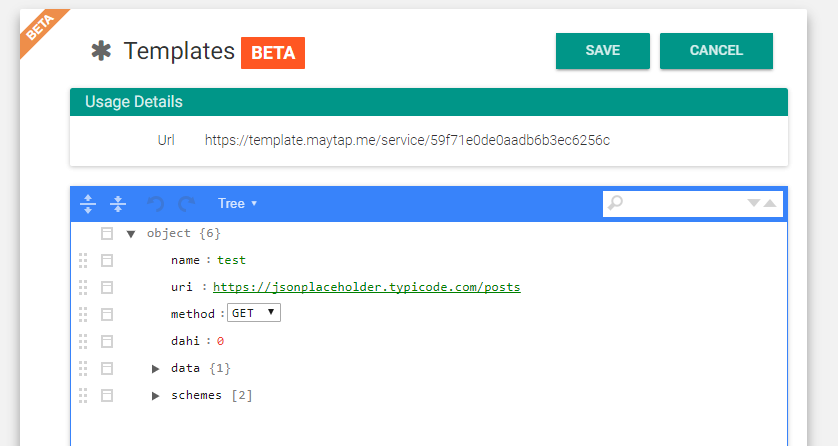
When you created a template if you revisit it's edit page you will see a url like https://template.maytap.me/service/59f71e0de0aadb6b3ec6256c that you can use to access to this template from any service. You'll get a unique id for each one of your templates. This REST service can be called with GET and POST methods. You can find more information in USAGE section
Template system is new and still under development and curently is BETA stage. When we update this system your old schemes might break.
Also our variable access system in template is different from dahi.ai's chat-bot system.
Main Paramaters
Here are some descriptions of which paramater means what.
| Key | Description | Default | Type | Required |
|---|---|---|---|---|
| name | Label for template, used to identify your templates from each other | No Default | String | No |
| uri | If your template needs to call a external REST service to extract data from you need to define it here. |
No Default | String | No |
| method | Which method used to call your uri call. GET or POST |
GET | String | No |
| dahi | Which shema | 0 | Number | No |
| data | Static data that can be used by this template with {{#data.variableName}} |
{} | Object | No |
| schemas | Schemas array. Look at shemas section for more information | [] | Array | Yes |
For uri you can use your static data or post data values. For more information check Paramater System Section
Schemas
// Output examples from this schema
// GET https://template.maytap.me/service/59f71e0de0aadb6b3ec6256c
{
  "multi_message": true,
  "messages": [{
      "type": "text",
      "text": "sunt aut facere repellat provident occaecati excepturi optio reprehenderit is where"
    },
    {
      "type": "text",
      "text": "qui est esse is where"
    },
    {
      "type": "text",
      "text": "ea molestias quasi exercitationem repellat qui ipsa sit aut is where"
    },
    {
      "type": "text",
      "text": "eum et est occaecati is where"
    }
  ]
}

// GET https://template.maytap.me/service/59f71e0de0aadb6b3ec6256c?s=1&data.y=12
{
  "multi_message": true,
  "messages": [{
    "type": "text",
    "text": "12 15"
  }]
}
Shema is a mapping style to used to create a output data. Your uri, method, data, REST Response from your uri, post body, query paramaters etc. can be used here. There are some keywords helper can be used here other than that you can also use Paramater System to import data to string values. Chat-bot system uses a specific message recognition from Call Service Operation if response from a Call Service is json and has {multi_message:true,messages:[]} Keyword it'll automaticly try to look messages array to and create messages from this array to send to the user. And objects in this array must be message formatted objects. For text message it can be like this {type:"text",text:"Hello, World!"}. This will create a Hello, World! message and send it as a response to the user. Because it's an array you can send multiple messages in one request call.
In this example there are two schemas first one has __each,__type,__limit helpers and type,text key-value pairs. You can find more information in Helpers Section and how {{}} works can be found in Paramater System.
We're adding more helpers and features according to the customers needs. If you think a helper would improve or help customers to create their templates easly you can contact us through [email protected]. Your suggestion must not break old shemas.
Paramater System
Paramater system currently can be used in 3 section __if helper, uri string for template and string values in schema. Check helpers section for more information for __if helper.
URI
curl -X GET \
  'https://template.maytap.me/service/59f71e0de0aadb6b3ec6256c?data.id=2'

or

curl -X POST \
  https://template.maytap.me/service/59f71e0de0aadb6b3ec6256c \
  -H 'content-type: application/json' \
  -d '{"data":{"id":1}}'
First of all let's say we want to pass a paramater to uri from post body we use to call template endpoint or get query paramaters to call template endpoint. At this point of system (creation of url) you have access to static data from template object, and body object. More info about body object can be found in Usage Section.
For example let's say our uri is like this https://jsonplaceholder.typicode.com/posts/{{id}}.
Here it will try to access data.id value from body. So we want to send id paramater in data here(As shown in examples at right section). As default {{key}} would try to read 'key' data from request.body.data object. If you want to access to static data from your template you can use {{#data.x}} shown in second schema.
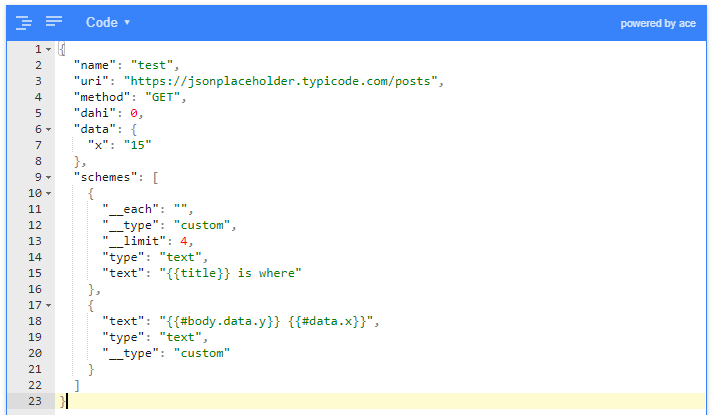
In string values
// Example url: https://template.maytap.me/service/59f71e0de0aadb6b3ec6256c?s=1&data.y=12
// Schema object used in this example
{
  "name": "test",
  "uri": "https://jsonplaceholder.typicode.com/posts",
  "method": "GET",
  "dahi": 0,
  "data": {
    "x": "15"
  },
  "schemas": [{
      "__each": "",
      "__type": "custom",
      "__limit": 4,
      "type": "text",
      "text": "{{title}} is where"
    },
    {
      "text": "{{#body.data.y}} {{#data.x}}",
      "type": "text",
      "__type": "custom"
    }
  ]
}

// Output from example
{
  "multi_message": true,
  "messages": [{
    "type": "text",
    "text": "12 15"
  }]
}
Here {{key}} would try to read from cursor. Cursor is most of the time would point at response recieved from uri request. But if it's inside an __each helper object it would point at array's object that currently used to create this iteration. More info __each helper section.
other then that you can access to scope with using # tag. If you want to access to request body that you used to call template you can use {{#body.x}} like if i use https://template.maytap.me/service/59f71e0de0aadb6b3ec6256c?s=1&data.y=12 url to call my template (Look at Schema object used in this example) in this call our body object would be {s:1,data:{y:12}} here s:1 means use schemas[1] to create our output. our output text is {{#body.data.y}} {{#data.x}} (from schema[1]) and created output shown at right section. Here you can see #body.data.y and #data.x used. As you can guess you can access to body with #body tag and #data is used to access to template.data object. In this schema it's just creating a simple message combining a static data stored inside template.data object and a variable from get url call.
Let's say your api response is {"arr":[1,2,3,4]} and you want to print second element from arr array. To do so you can use {{arr[1]}} to print it.
Another example with {"test":{"text":"hello"}} response data to print hello world we can use {{test.text}}, World! complete shema would look like this. {{__type:"custom",type:"text",text:"{{test.text}}, World!"}}. Here __type would wrap our object inside {multi_message:true,messages:[<here our object would be put>]} so dahi.ai can understand that this template a message printing operation. type:"text" is defines what type of message is this. and text would be what will be sended to the user.
Javascript and Accessible libraries
If you stuck with the thing you want to do and can't do with other tools you can always use javascript. To use javascript you need to start with an $ character like {{$[1,2,3].join(',')}}. You can access to current cursor with item variable like {{$item.title.replace('test','')}} and can access to scope with __root keyword.
For example; if you want to access to data, you could use {{#body.data.y}} would be equal to {{$__root.body.data.y}}.
Libraries that can be accessed from inside of javascript code are as follow; Moment.js (moment)docs, lodash (_)docs.
Html tags clear helper
This is a simple clear helper to clear tags like <br> or \n\t. It's usage is simple. You just need to add ! to start of {{}} like {{!title}}. It would get title and then clear extras.
Helpers
Helpers are there to make things easier or add some features that you can do with basic features.
Priority of helpers, and their sub keywords.
| Order | Sub Keys |
|---|---|
| __type | |
| __html | |
| __request | |
| __each | __next, __limit, __filter |
| __if | __then, __else |
| __num | __next |
| __json | __next |
| __run |
__if helper
// Example
{
  "__type": "custom",
  "__if": "{{completed}}",
  "__then": {
    "type": "text",
    "text": "Finished Work - {{title}}!"
  },
  "__else":{
    "type": "text",
    "text": "Unfinished Work - {{title}}!"
  }
}

// Samething as above but different approach
{
  "__type": "custom",
  "type": "text",
  "text": {
    "__if": "{{completed}}",
    "__then": "Finished Work - {{title}}!",
    "__else": "Unfinished Work - {{title}}!"
  }
}

// Javascript example
{
  "__if":"'{{title}}'.indexOf('dahi.ai') > -1", // If title string contains dahi.ai returns true
  "__then": true,
  "__else": false
}
__if helper uses two more paramaters. They are __then and __else. __if helper takes a string value that filled with javascript condition code like true, '{{finished}}'==='yes', {{id}} > 1, '{{name}}'.length > 20 , etc. As you can see you can use our Paramater System inside this string. If this value is true it'll use __then's value as generator, if not true it'll use __else's value as generator. If it looks for __then's or __else's value and can't find one it'll generate null. __then and __else value can be anything that is valid as
For example; Let's create a template that uses https://jsonplaceholder.typicode.com/todos api. We want to print messages according to the todo's completed status. If it's completed we want to add Finished tag to start of items text data. In example we created there are two schemas. First one returns only the ones that has completed:true. Second one prints every one but adds Finished Work or Not Finished Work to start of the text according to the completed value.
__each helper
// Example for __each
// Mock data used:
{
  "title":"dahi.ai template",
  "list":[{"x":1},{"x":2},{"x":3},{"x":4},{"x":5},{"x":6},{"x":7},{"x":8}]
}

// Schema Used
{
  "__each": "list",
  "__filter": "{{x}} % 2",
  "__limit": 2,
  "__next": { "__num": "{{x}}" }
}

// Output
[1, 3]
This is a foreach operation. It's value should point to a json array. If array is root of the json response __each's value should be "".
For example let assume our request from external service is {test:[{key:1},{key:2}]} and our schema is {__each:"test",number:"{{key}}"} would generate [{number:"1"},{number:"2"}].
__limit helper for __each
This is a helper for __each helper to put a limit to how much item would you like to return maximum. Value must be a integer.
__filter helper for __each
This is a helper for __each helper to filter arrays. It works same as __if helper but would be applied to each element before processing __each helper.
__next helper for __each
This is a helper to wrap what should be used for __each iteration elements.
__type helper
// Example horizontal type Schema
{
  "__type": "horizontal",
  "__limit": 2,
  "title": "{{title}}",
  "subtitle": "subtitle {{title}}",
  "image_url": "",
  "buttons": [],
  "__each": ""
}

// Example horizontal type Output From Schema
{
  "multi_message": true,
  "messages": [{
    "type": "horizontalscrollarray",
    "values": [{
        "image_url": "",
        "buttons": [],
        "subtitle": "subtitle delectus aut autem",
        "title": "delectus aut autem"
      },
      {
        "image_url": "",
        "buttons": [],
        "subtitle": "subtitle quis ut nam facilis et officia qui",
        "title": "quis ut nam facilis et officia qui"
      }
    ]
  }]
}
This a wrapper helper. Value generated from this object would be wrapped inside __type's wrapper. There are currently 2 wrappers custom and horizontal.
custom wrapper would wrap output object inside a dahi.ai chat-bot send message operation format. {multi_message:true,messages:[<here our object would be put>]}. If the object that will be wrapped is array it would append to messages array. The object inside messages array must be a dahi.ai message formatted object like {type:"text",text:"Hello, World!"}.
horizontal wrapper would wrap output object inside a dahi.ai chat-bot horizontal message type. Look at example for more information.
__request helper
// Get Example
{
  "__request":{
    "uri":"https://jsonplaceholder.typicode.com/todos",
    "then":{
      "__each":"",
      "__limit":3,
      "text":"{{title}}"
    }
  }
}

// Output of example above
[
  {
    "text": "delectus aut autem"
  },
  {
    "text": "quis ut nam facilis et officia qui"
  },
  {
    "text": "fugiat veniam minus"
  }
]

// Post Example
{
  "__request":{
    "uri":"https://jsonplaceholder.typicode.com/todos",
    "method":"post",
    "body":{
      "id":3,
      "title":"product title {{name}}"
    },
    "then":{
      //if you want to do something with response
    }
  }
}
This is a tool to call external services. You can find an example of it at right section.
Some more info about it;
| Key | Description | Default | Type | Required |
|---|---|---|---|---|
| uri | If your template needs to call a external REST service to extract data from you need to define it here. |
No Default | String | Yes |
| method | Which method used to call your uri call. GET or POST |
GET | String | No |
| body | Body data if we want to post something. | {} | Object | No |
| then | Uses the response from request to continue with schema. | No Default | Schema | No |
| headers | Headers used with request. | {} | Object | No |
__run helper
// Example 2 Schema which this schemas are in a template which it's id is "5a09415f91be0e2aef74b452"
[
  {
    "__run":"5a09415f91be0e2aef74b452.1",
    "__next":{
      "text":"From 0. Schema, {{text}}"
    }
  },
  {
    "__run":"5a09415f91be0e2aef74b452.2"
  },
  {
    "text":"From 2. Schema"
  },
  {
    "__run":"5a09415f91be0e2aef74b452"
  }
]

// Call url https://template.maytap.me/service/5a09415f91be0e2aef74b452
{
  "text":"From 0. Schema, From 2. Schema"
}

// Call url https://template.maytap.me/service/5a09415f91be0e2aef74b452?s=3
{
  "text":"From 0. Schema, From 2. Schema"
}
This is a helper to run another schema with current objects. This is a jump helper to access your other helpers.
In example we created a template with 4 schema and called first and fourth schema. When we call first schema it calls "5a09415f91be0e2aef74b452.1" schema which is [1] indexed schema of "5a09415f91be0e2aef74b452" template and continues to __next with the data retrieved from that schema and generates output "From 0. Schema, From 2. Schema".
__next helper for __run
When __run is used alone it would return the data from the template called but if you want to use that data use create something else you can add __next to same level as __run and continue your schema from there.
__num helper
// Schema
{
  "parsed_number":{ "__num" : "0.2" }
}

// Output
{
  "parsed_number":0.2
}
This is a helper to parse numbers from string. In example we put static "0.2" string but you can put the number with "{{number}}".
__json helper
// Schema for __json
{
  "parsed_json":{ "__json" : "{\"test\":\"test text\"}" }
}

// Output for __json
{
  "parsed_number":{ "test": "test text" }
}
This is a helper to parse json from string.
__next helper for __json
// Schema for __json with __next
{
  "parsed_json":{
     "__json" : "{\"test\":\"test text\"}",
     "__next":{
       "next_next": "last {{test}}"
     }
  }
}

// Output for __json with __next
{
  "parsed_number":{ "next_next": "last test text" }
}
This is a helper to continue schema with data parsed from json string. In example we put static "{\"test\":\"test text\"}" string but you can define it with "{{json}}" with external stringfied text.
__html helper
// Example Template
{
  "uri":"https://www.lipsum.com/feed/html",
  "schemas":{
    "__html":{
      "title":"{{#Inner > h1}}",
      "paragraphs":{
        "__each":"#lipsum p",
        "text":"{{$$(item).text()}}"
      }
    },
    "sys":"from {{title}}",
    "texts":{
      "__each":"paragraphs",
      "__next":"{{text}}"
    }
  }
}

// Outpu from example above
{
  "texts": [
    "Lorem ipsum dolor sit amet, consectetur adipiscing elit. In in tincidunt purus. Nunc et justo augue. Cras ut fringilla erat. Fusce quis aliquam elit, vitae cursus dui. Nam interdum neque a auctor congue. Fusce facilisis arcu ut odio accumsan, nec vehicula libero auctor. Maecenas lorem neque, interdum ac magna ut, bibendum egestas ipsum.",
    "Sed mauris dolor, pharetra nec urna eu, eleifend fringilla felis. Aenean laoreet aliquet libero eu efficitur. Donec a augue lectus. Etiam in lacinia nulla, vitae pellentesque nunc. Phasellus hendrerit mattis posuere. Nulla condimentum, sapien a scelerisque bibendum, neque tellus laoreet nisi, at bibendum dolor mi eget dui. Sed id lorem finibus, pellentesque nulla eu, scelerisque dolor. Nulla sed lectus dolor. Nulla accumsan felis pharetra nibh porta, non egestas dui placerat. Donec fringilla leo ac sem tempus, sed porttitor diam malesuada. Suspendisse quis arcu risus. Maecenas tempor ultricies tellus, nec pharetra elit vulputate in. Nam leo ante, mollis sit amet mollis et, vehicula ac velit.",
    "Cras tincidunt efficitur lacus non varius. Curabitur scelerisque nulla non mauris vehicula tempus. Aenean tellus sapien, mollis eget odio sed, posuere efficitur diam. In suscipit blandit eleifend. Suspendisse fringilla urna ac quam feugiat, efficitur feugiat enim viverra. Quisque congue purus eget finibus volutpat. Class aptent taciti sociosqu ad litora torquent per conubia nostra, per inceptos himenaeos. Vivamus varius pharetra convallis. Integer ullamcorper quam libero, eget elementum eros dapibus a.",
    "Ut elit ipsum, faucibus vitae elit quis, finibus viverra velit. Pellentesque magna sem, fringilla quis finibus id, egestas ut nunc. Nullam sit amet neque finibus, lacinia mi id, interdum magna. Donec eget ligula sem. Mauris sodales est in efficitur maximus. Duis quis convallis risus, at gravida nulla. Duis tempor commodo neque, ac mattis odio malesuada vel. Phasellus tempus dui eu congue dictum. Vivamus suscipit efficitur sapien, nec faucibus quam. Etiam porttitor ante in bibendum iaculis. Curabitur diam lectus, dapibus in arcu at, interdum accumsan leo. Quisque vulputate libero in neque lacinia, in elementum neque pulvinar.",
    "Sed vel blandit ligula, a mattis libero. Suspendisse in velit felis. Morbi eleifend turpis ut lacus facilisis, vitae varius enim hendrerit. Proin a dictum odio. Ut ut est vehicula, feugiat massa eget, rhoncus nibh. Phasellus ac magna porta, venenatis sapien vitae, elementum ipsum. Donec in libero non turpis pretium rutrum nec sit amet erat. Praesent dapibus sed quam sed tincidunt. Mauris luctus ultrices risus, ultricies fermentum libero convallis ut."
  ],
  "sys": "from Lorem Ipsum"
}
This is a parser with different rules. Basic "{{key}}" rule still works. But instead of key's we need to give it some css selector or javascript code to get what we want. In first example we're using each to get an array of items then uses them to define values for items. `htmlhelpers would work before other helpers and replace current cursor with crawled data. The helpers work after__html` helper would use the cursor from it.
In example there is 2 different usage way to get data first is {{#Inner > h1}} and second is {{$$(item).text()}}; Actualy first one is almost same as second but it's short way to write and don't need much knowledge about jquery or cheerio. {{#Inner > h1}} would be equal to {{$$('#Inner > h1').text()}} if it's not inside in an __each helper. If it's inside of a __each helper it would mean {{$$(item).find('#Inner > h1').text()}}.
__each helper for __html
You can use it like this {"__html":{"__each":"#item-list .product","title":"{{h1}}"}}. In this example it would get the dom elements with product class inside a dom that it's id is item-list. Then for each product it would try to find an h1 tagged dom and put's it's text to title keyword. This would create an array with products titles like [{"title":"item 1"},{"title":"item 2"},{"title":"item 3"}] and put it as our cursor. Next we can do something with this like: {"__html":{"__each":"#item-list .product","title":"{{h1}}"},"__each":"","last":"{{title}}"} and it would generate [{"last":"item 1"},{"last":"item 2"},{"last":"item 3"}].
Note: Inside __each you don't need to use {{}} like normal __each.
How to use advanced features
You can use any features from popular nodejs library for html dom parsing cheerio (Go to Cheerio docs). To use it you need to put a $ sembol to start of {{}} paramater system like {{$}} then you can write cheerio code inside of it. You can access to current cursor object with item variable like {{$$(item).find('img').attr('src')}} this would search for img tagged element and get it's src attribute. For more information you can check cheerio docs.
Usage
// Template
{
  "uri":"https://jsonplaceholder.typicode.com/posts/{{id}}",
  "method":"GET"
}

// Call url https://template.maytap.me/service/5a09415f91be0e2aef74b4d3?data.id=1&raw=true
{
  "userId": 1,
  "id": 1,
  "title": "sunt aut facere repellat provident occaecati excepturi optio reprehenderit",
  "body": "quia et suscipit\nsuscipit recusandae consequuntur expedita et cum\nreprehenderit molestiae ut ut quas totam\nnostrum rerum est autem sunt rem eveniet architecto"
}

// Call url https://template.maytap.me/service/5a09415f91be0e2aef74b4d3?data.id=2&raw=true
{
  "userId": 1,
  "id": 2,
  "title": "qui est esse",
  "body": "est rerum tempore vitae\nsequi sint nihil reprehenderit dolor beatae ea dolores neque\nfugiat blanditiis voluptate porro vel nihil molestiae ut reiciendis\nqui aperiam non debitis possimus qui neque nisi nulla"
}

// Template
{
  "uri":"https://jsonplaceholder.typicode.com/posts/{{id}}",
  "method":"GET"
}

// Post to url https://template.maytap.me/service/5a09415f91be0e2aef74b4d3
{
  "data":{
    "id":1
  },
  "raw":true
}

// Response
{
  "userId": 1,
  "id": 1,
  "title": "sunt aut facere repellat provident occaecati excepturi optio reprehenderit",
  "body": "quia et suscipit\nsuscipit recusandae consequuntur expedita et cum\nreprehenderit molestiae ut ut quas totam\nnostrum rerum est autem sunt rem eveniet architecto"
}
What template api looks when a request made is id of your template, index of which schema you want to use s:0 default. Data to use in uri creation or to post to external server. Should response generated with dahi schema dahi:false default.
If we combine these we'll get a object like this: {s:0,data:{},id:"5a0407686090c8750ae9baa9",dahi:false}. For more example look at right section.
How to get raw response to debug
If you add ?raw=true to your url or add raw:true to your request json if you are using post method. With this you can debug what our system recieves before generation a output data from external api that defined from uri. example url: https://template.maytap.me/service/5a0407686090c8750ae9baa9?raw=true.
With GET Call
In this method (When template.method="GET") data would be used to generate uri. Let's say our uri in template is https://jsonplaceholder.typicode.com/posts/{{id}}. It needs id to generate this uri so need to pass id value inside data object so our call uri needs to be https://template.maytap.me/service/<id>?data.id=1. This uri would generate {s:0,data:{id:1},dahi:false} object and send it to template.
With POST Call
It's same with get method but in this we're sending all the information in request body.
Template's POST Method
In previous sections we have examples that uses method GET. For template that uses POST there is just a small difference. data from {s:0,data:{},dahi:false} would be used as request body to call your uri that defined in template.